| |
|
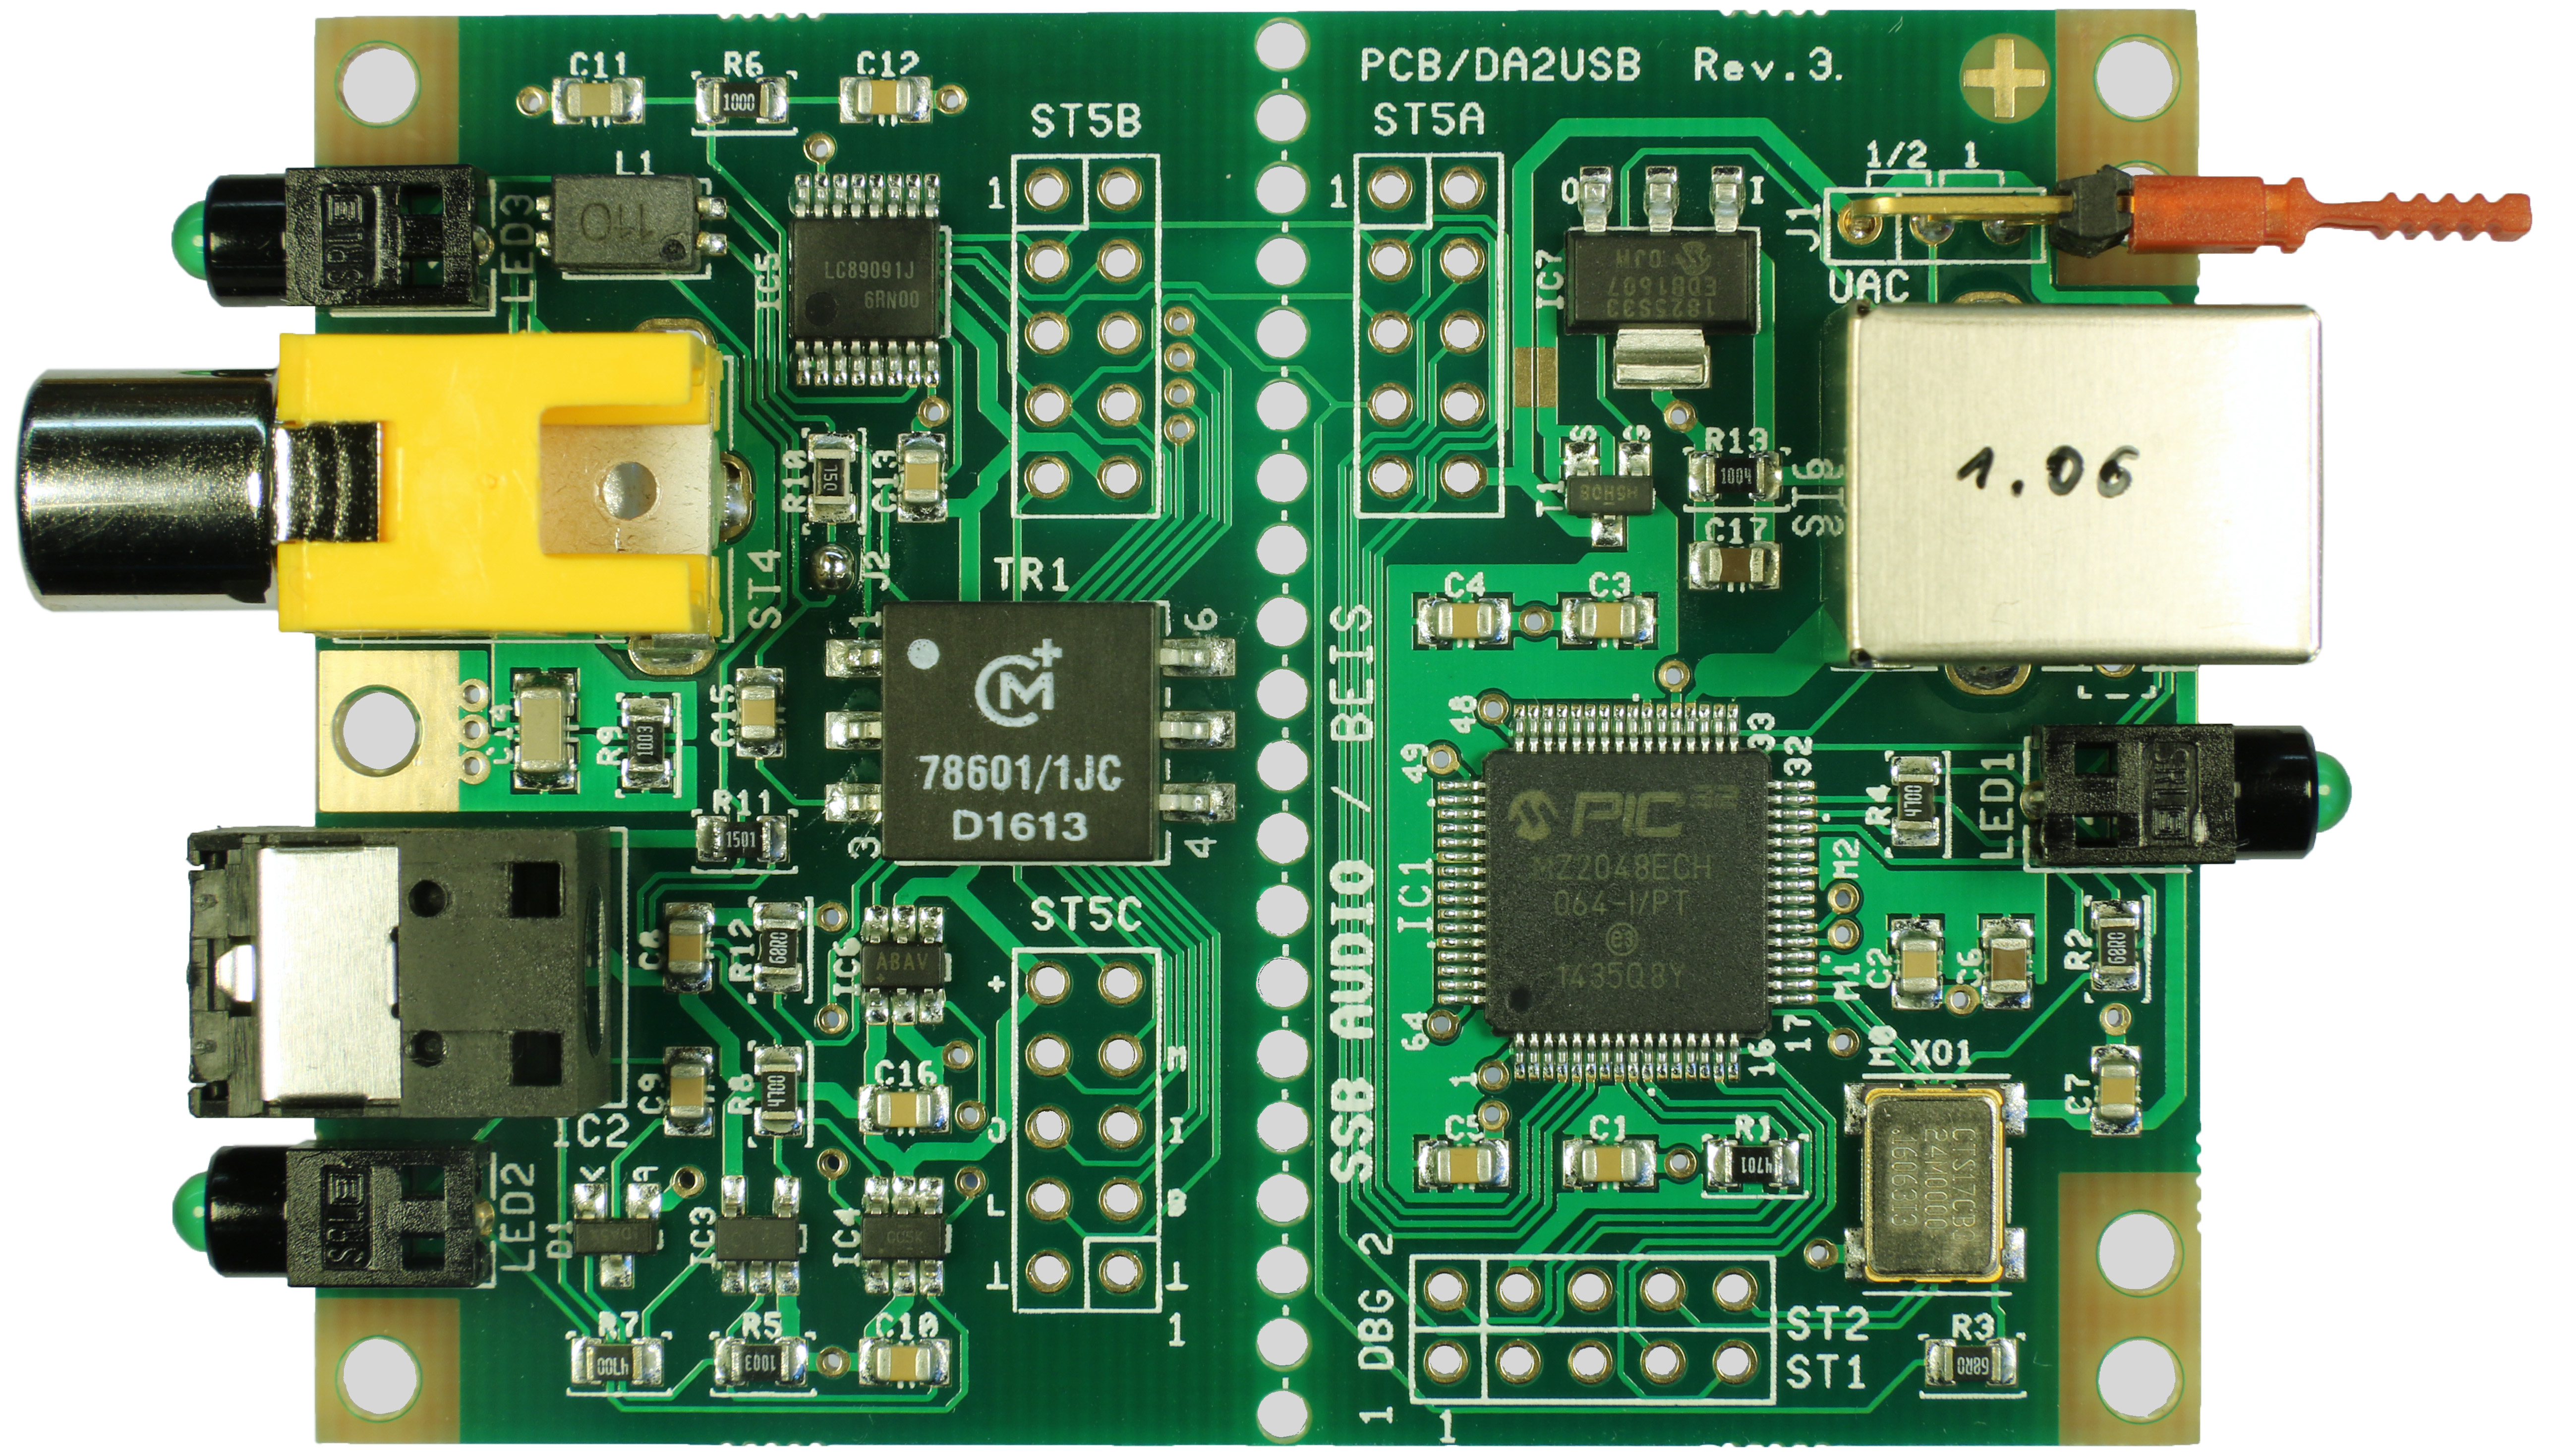
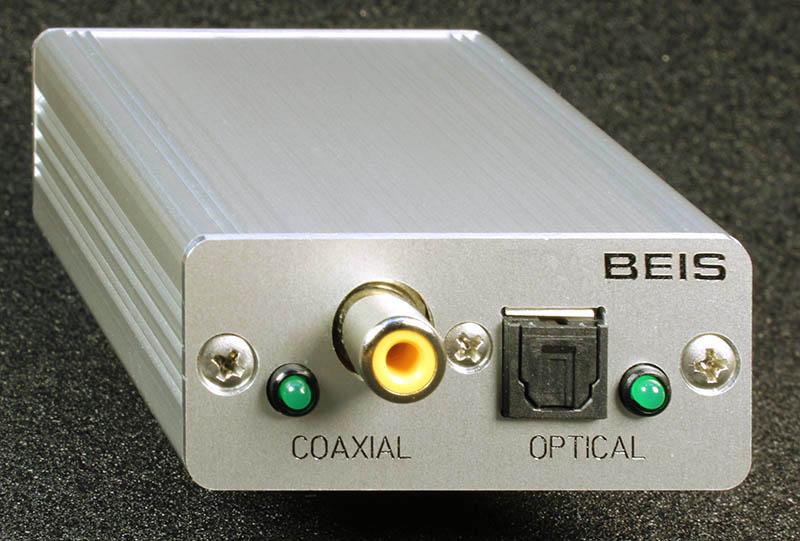
DA2USB - Digital Audio to USB Interface
(Driverless - no software to install
Up to 192 kHz/24 bit (Mac OS-X, Linux and Windows 10 from vers. 1709 on)
Up to 96 kHz/24 bit and 192 kHz/16
bit (earlier Windows versions)
 |
|
|
| |
|
DA2USB - Digital Audio to USB Interface
(Driverless - no software to install
Up to 192 kHz/24 bit (Mac OS-X, Linux and Windows 10 from vers. 1709 on)
Up to 96 kHz/24 bit and 192 kHz/16
bit (earlier Windows versions)
|
|
|
|
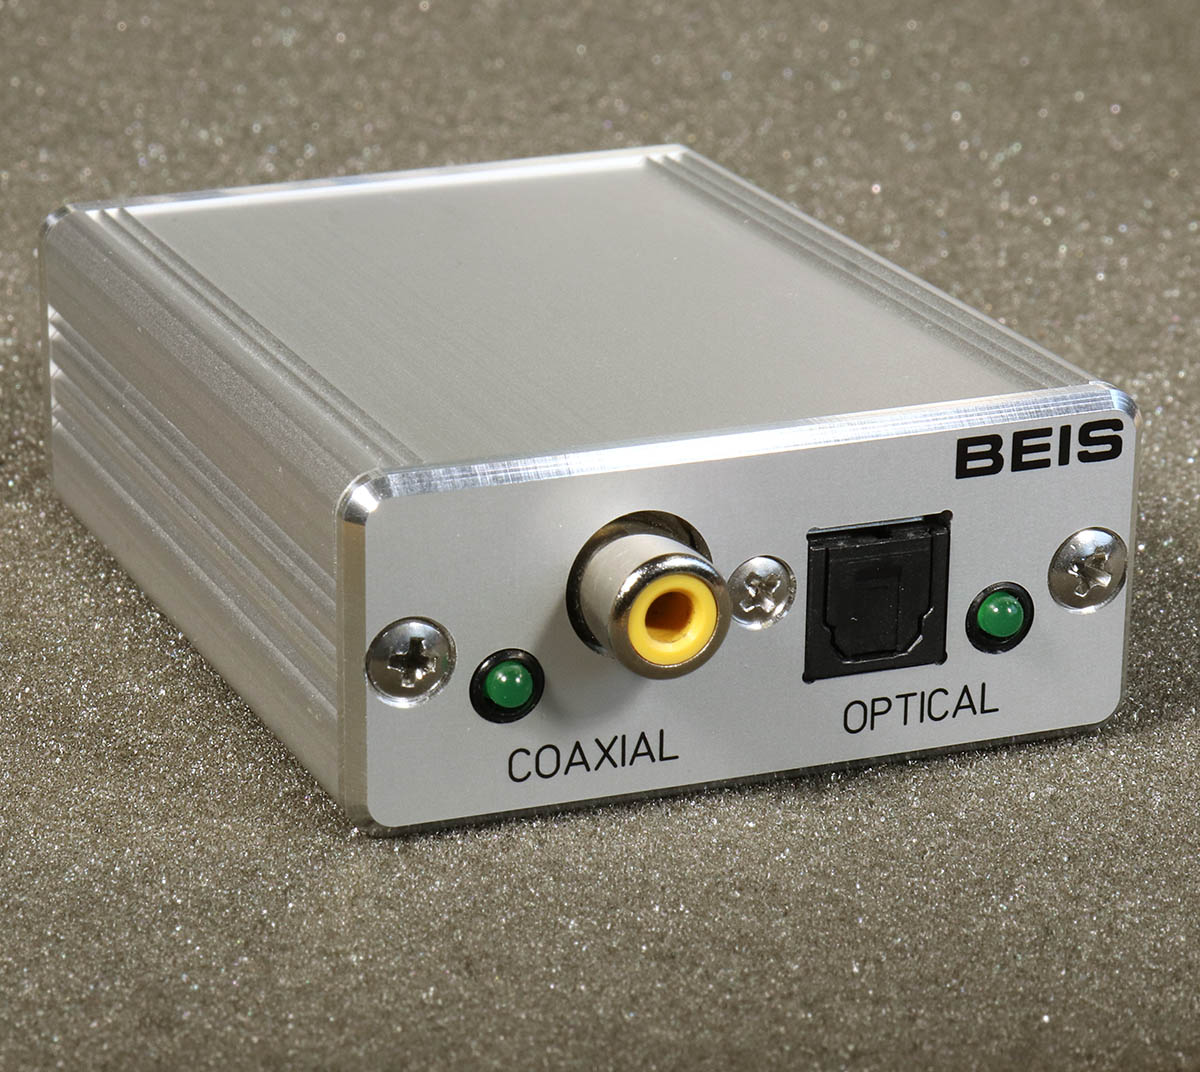
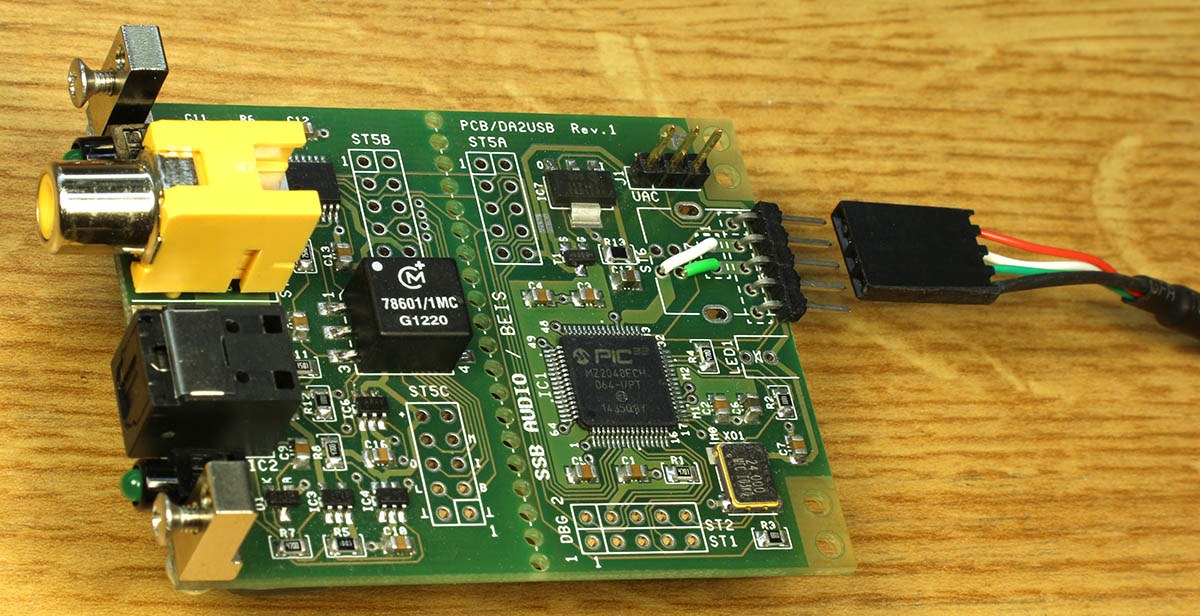
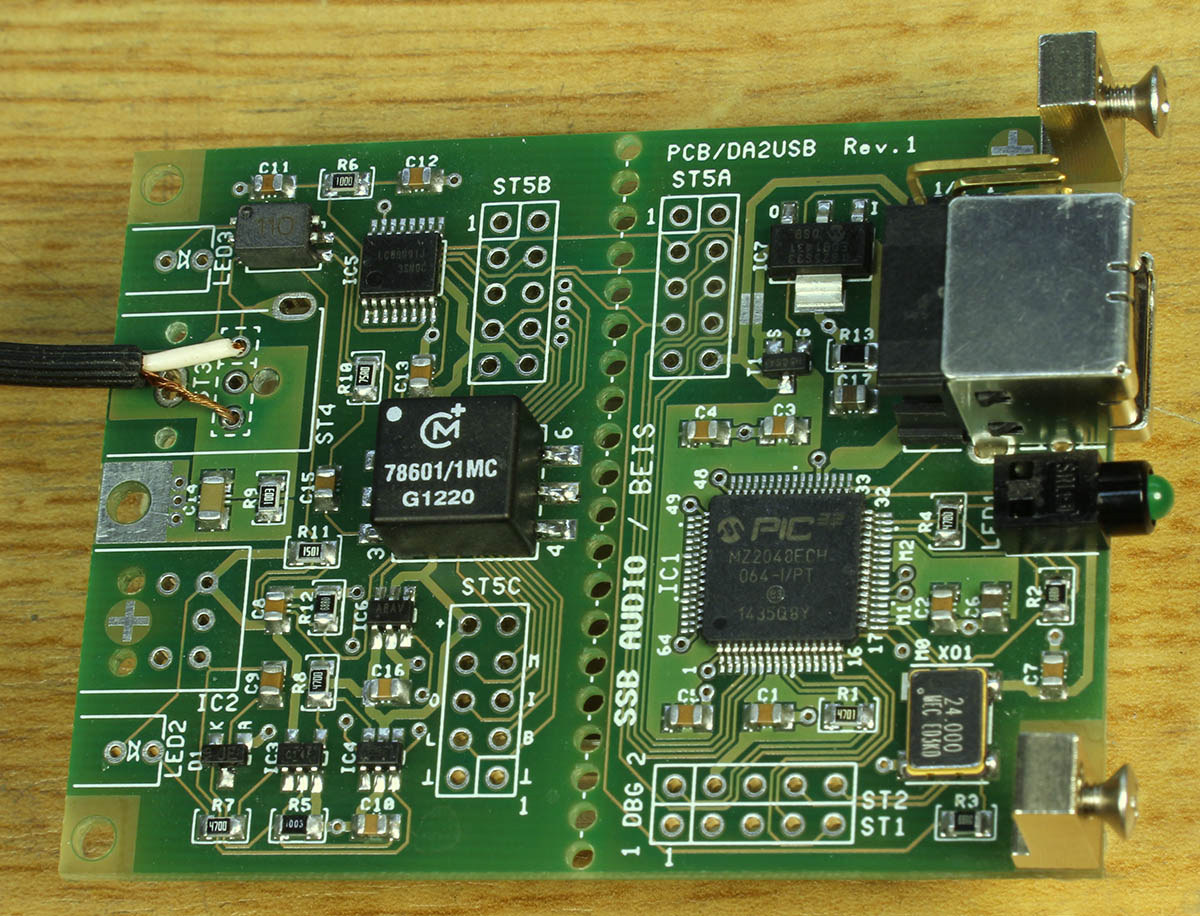
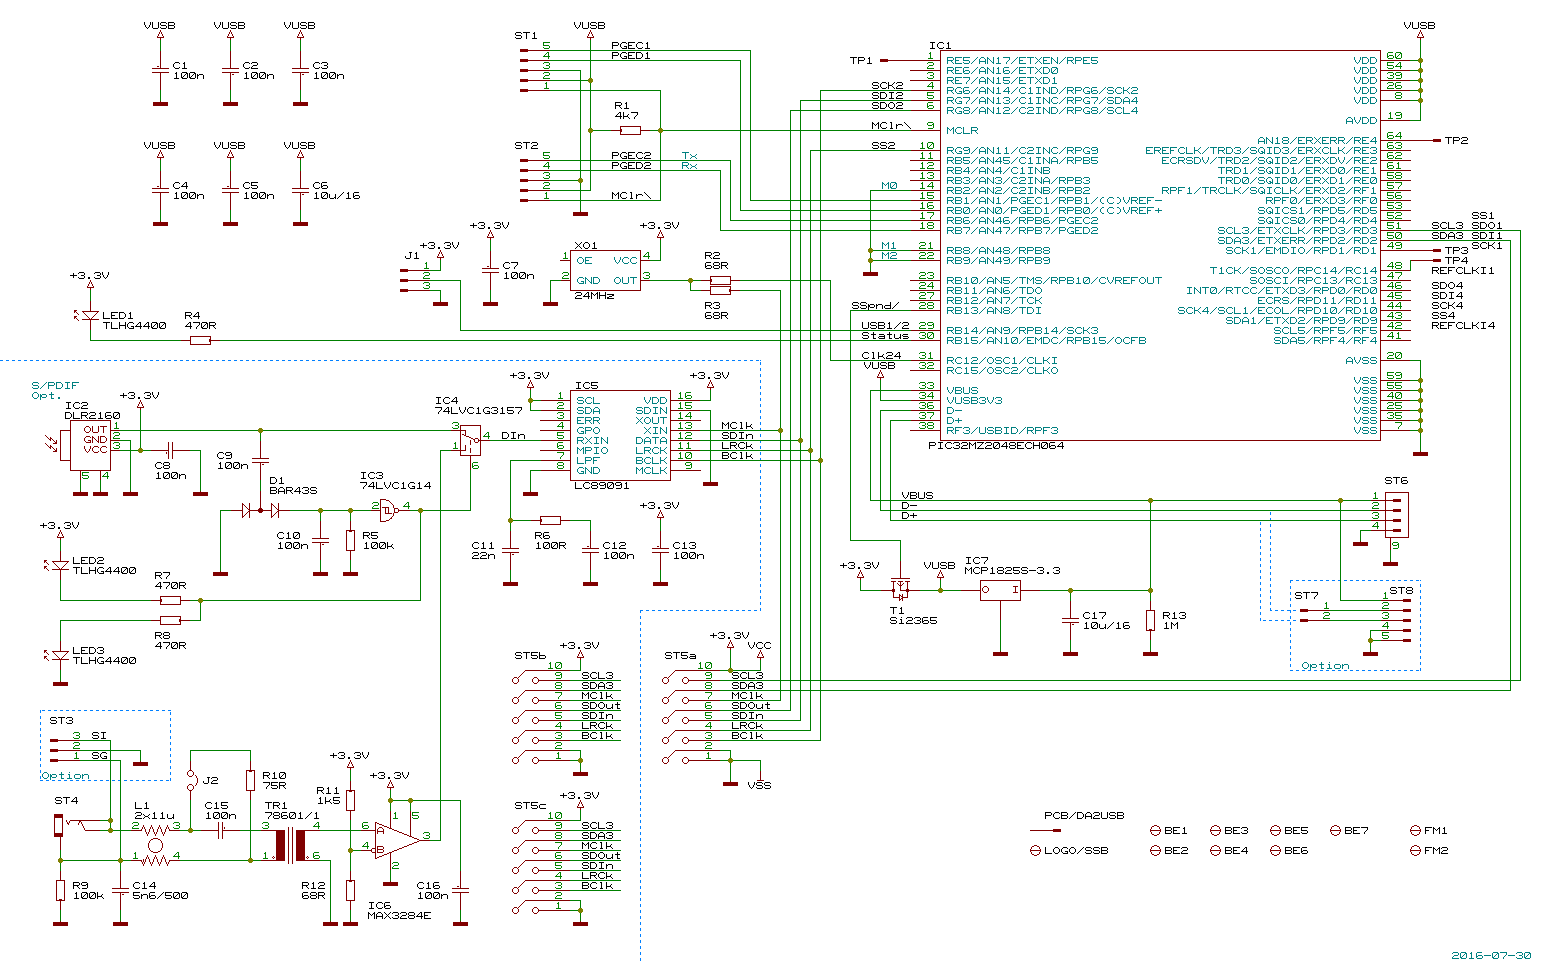
The DA2USB is a USB interface for connecting digital audio sources (S/PDIF or Toslink, with adapters also AES3) to a PC. It comes without proprietary drivers, i. e., there is no software to install and there is no threat that the hardware sometime will become obsolete waste because the manufacturer does not support it any more with up-to-date drivers (like my fine and expensive sound card did).
It works in a single direction only. That means that it has digital audio inputs but no audio output. It is a perfect complement to an AD24QS analog-to-digital converter.
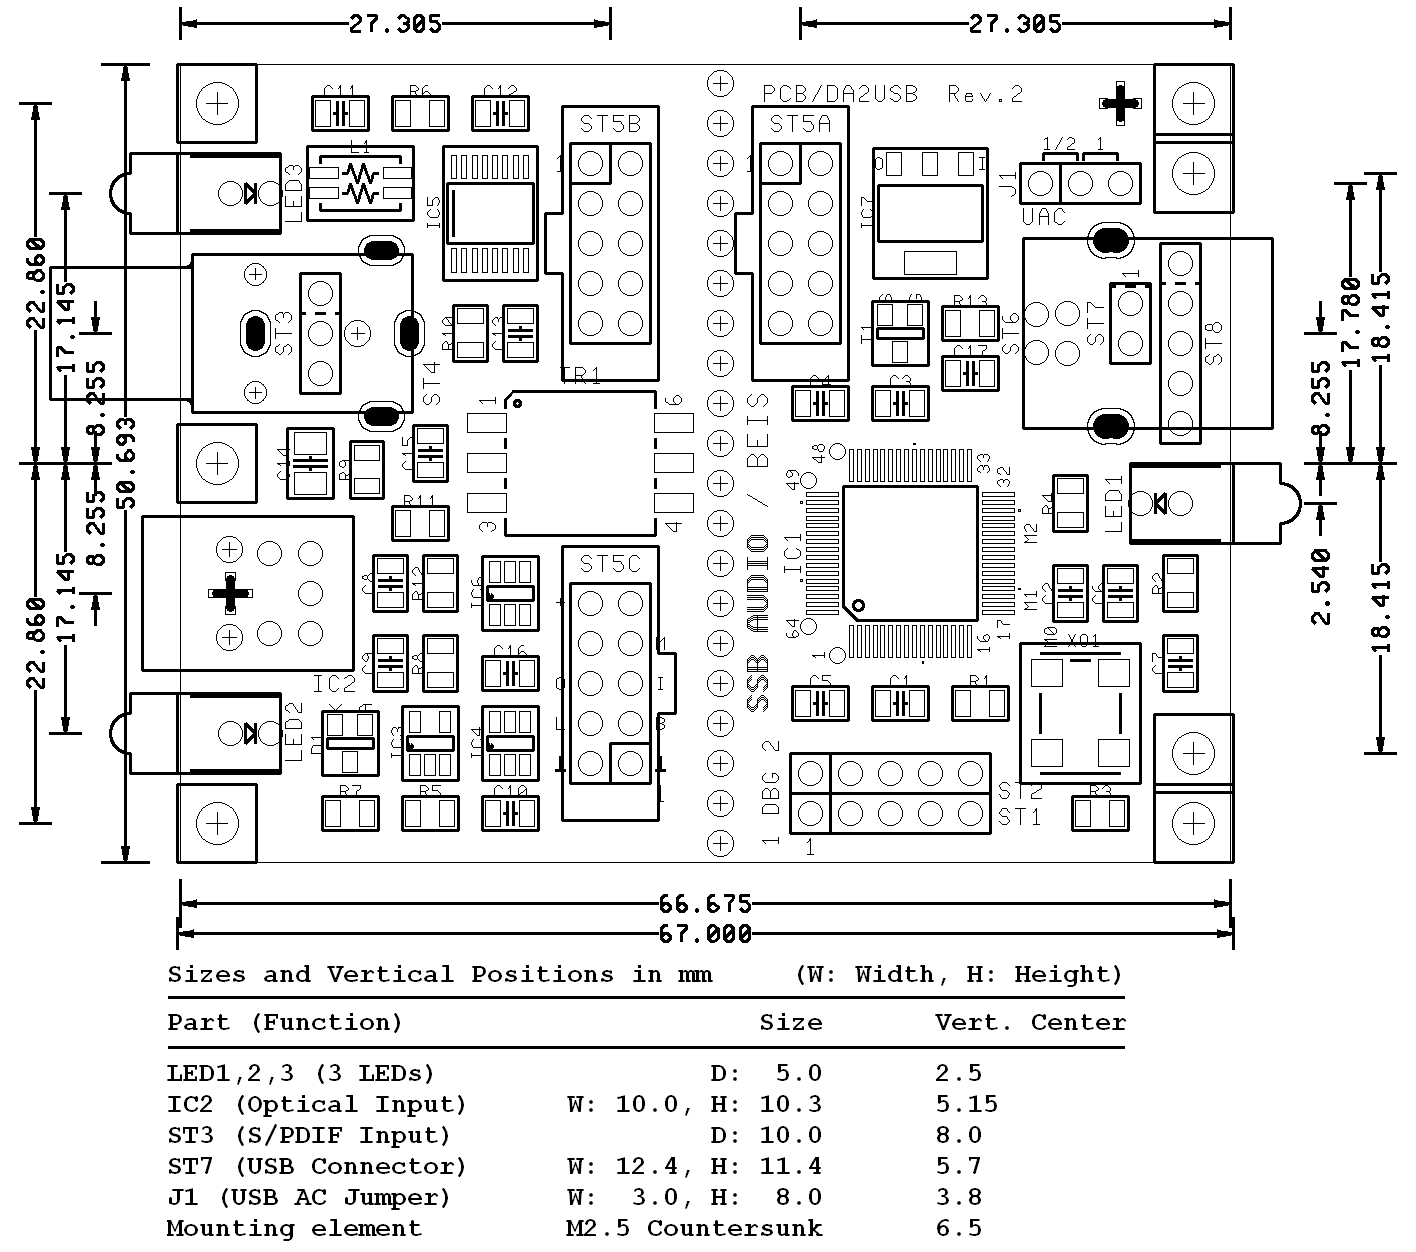
The device comes as a kit with all SMDs soldered, the processor programmed and the board tested. Up to 7 THT devices must be populated by the user. There are several variation possibilities so that it can be flexibly built into individual enclosures.
The "lowlight" is: Because it doesn't come from far east and isn't produced in large quantities it is not as cheap as it might look...
When I sold my ADC kits I was often asked how to get the ADCs' digital audio data into a PC. This was a little frustrating because I had no other answer than to recommend a sound card with a digital audio input. I did not know any device that was able to transfer digital audio invariably straight into a PC, preferably a USB device. No such solution seemed to be available in the world. Moreover, only few sound cards are capable of sampling rates higher than 96 kHz and are additionally able to guarantee invariable straight data handling. The other direction for e.g. DACs is not a big issue. With our SSB Audio ADICON (and the fact that my fine and expensive sound card became pure waste with Windows 10) the pressure to design an own interface rose. Two chip sets were available on the market but I was deeply disappointed about the manufacturers' support and it was doubtful whether they would work the way we required at all.
I asked a friend of mine, a really very skilled hard- and software designer, whether he could help me to make one of these chip sets work, but he didn't want to design a doubtful solution on anybody else's design, so he went for his (resp. our) own proprietary solution, using a PIC processor and a fully hand-written USB Audio Class 1 and 2 firmware. He is skilled, but had he known what kind of adventure this would become - well, maybe we still wouldn't yet have our USB interface! Later we modified the ADICON's USB interface's hard- and firmware to a universal device which I named DA2USB - so here it is.
I cared about the hardware only, it is my friend who filled it with life. All approvals, kudos and expressions of thanks belong to him. Thank you, Carsten, what a fantastic job!
Digital audio inputs:
Accepted sampling rates (kHz):
8 11.025 12 16 22.05 24 32 44.1 48 64 88.2 96 128 176.4 192 Deviations of about +/- 4% from the nominal frequency are accepted and displayed with the corresponding nominal frequency.
Resolution:
It does not matter if a source with a different resolution than 24 bit, e.g. a CD player with 16 bit, is connected.
Power supply: USB bus powered, 160 mA (USB-B connector)
The DA2USB accepts AES3id and AES3 resp. AES/EBU signals, too. Because nothing but the pure audio data is transmitted via USB, the differences between the protocols of S/PDIF and AES3 don't matter.
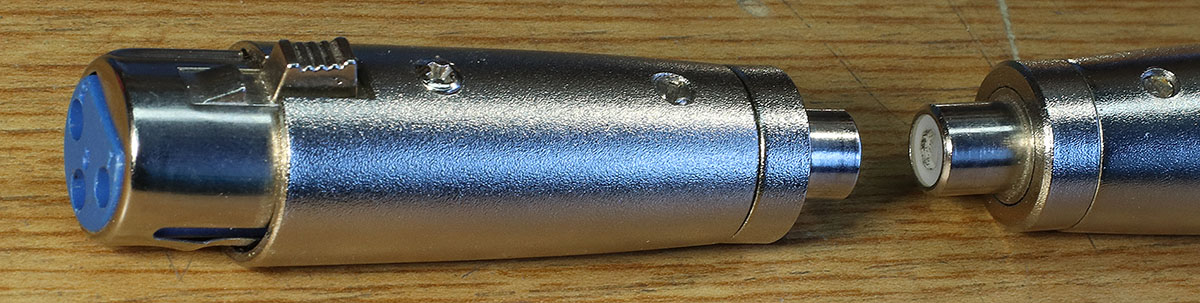 The quickest (and dirtiest) solution is to use a simple and cheap XRL-to-RCA adapter. The impedance will not match correctly and, in case the AES3 output is not transformer coupled, its negative output is shorted to ground. Finally, the signal voltage is higher than specfied for S/PDIF.
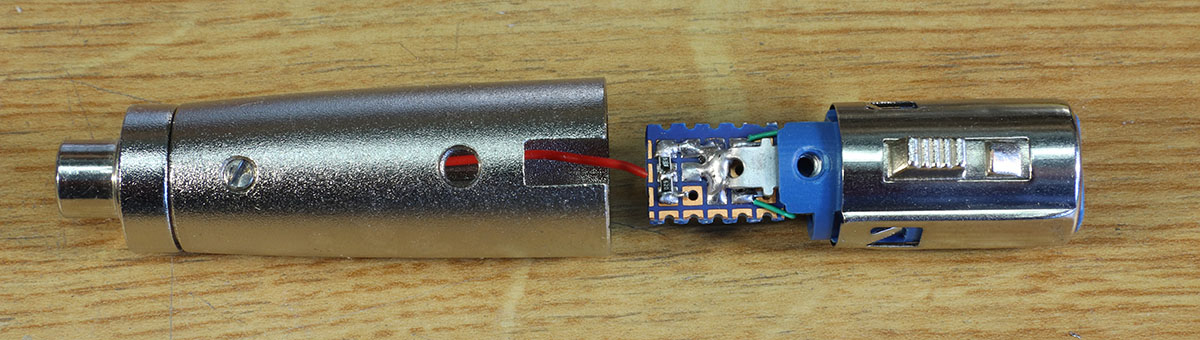
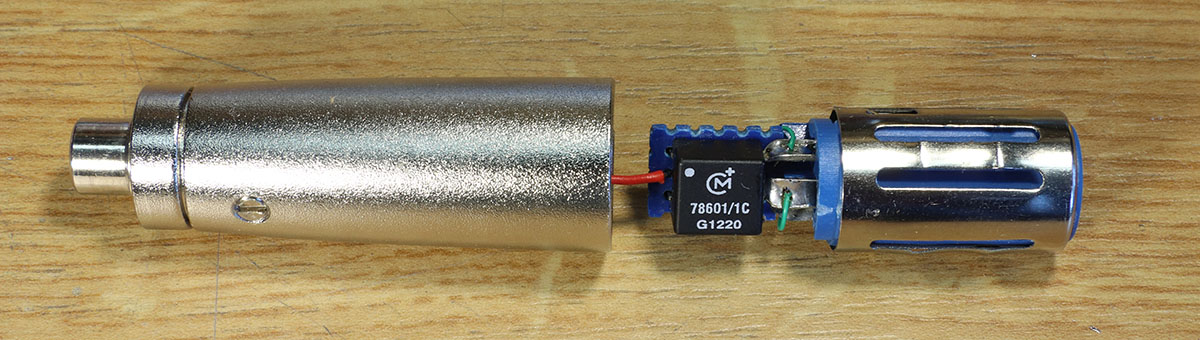 If you want it more professional, you can use an adapter with an internal isolating and impedance matching transformer (which is rare and exotic) or with a standard isolating transformer and an impedance matching resistor network.
Because I didn't search for a source for such an adapter and because I had all parts here, I built my own one. The signal level coming out of my adapter is still too high, but I doubt that it makes sense to correct that because usually each device is able to handle these higher signal levels. Anyway, with an additional resistor even this can be corrected so that the adapter would finally become technically perfect.
Due to the level differences the operation of such an adapter in the reverse direction is not recommended. It may be that it works, but it is unsafe.
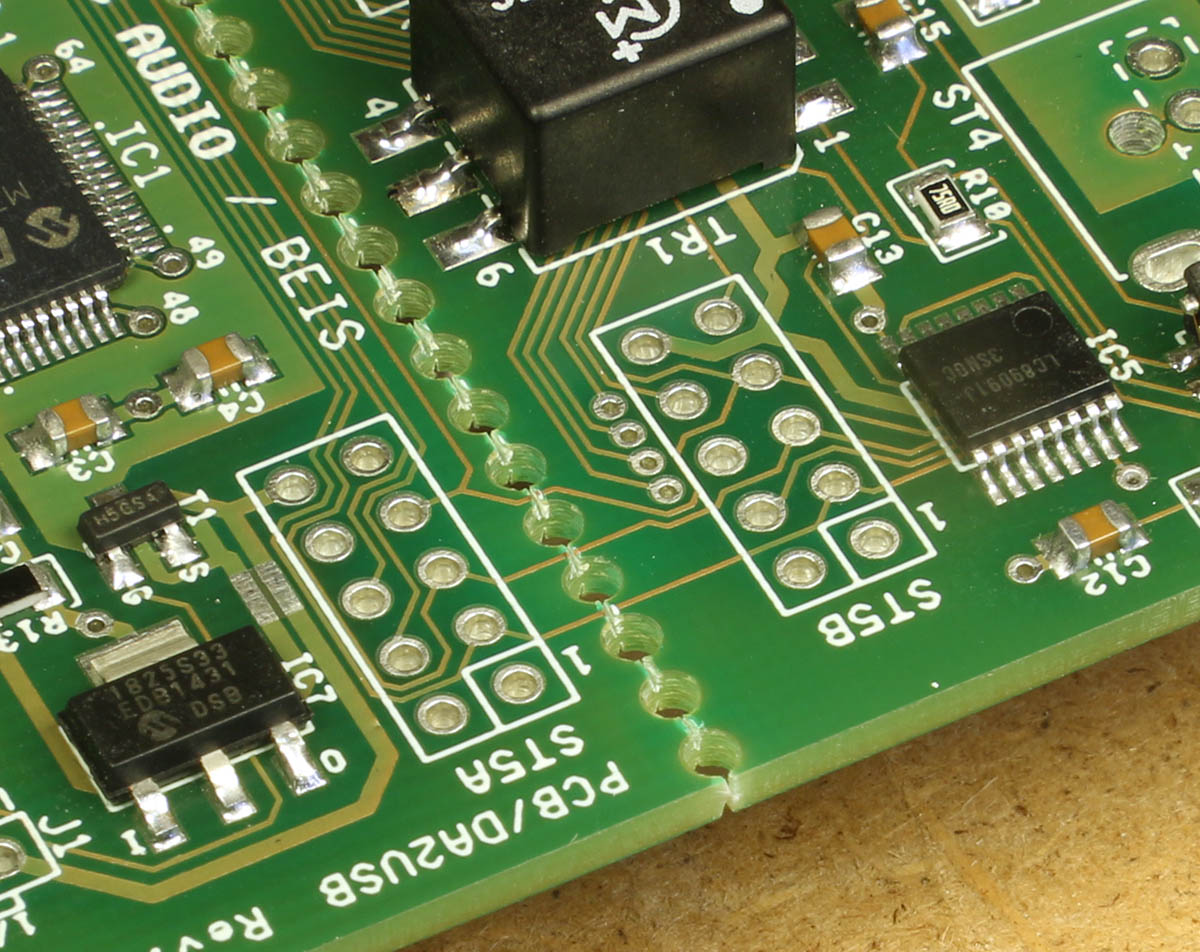
Notes: ST3, pin 2 (Ground) is the middle pin. The XLR pins 2 and pin 3 (Signal+ and Signal-) may be interchanged as required.
Also, the termination resistor R10 (75 Ω, near to jumper J2) must be replaced by 110 Ω (or instead of the jumper, an approx. 33 Ω resistor can be soldered.)
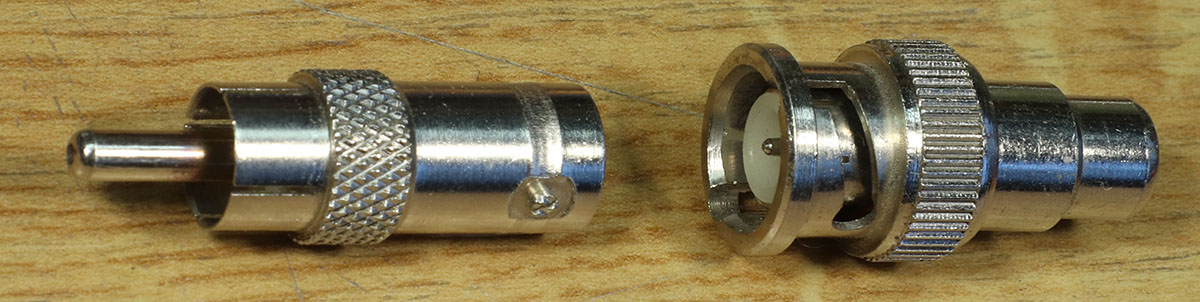 Interfacing to AES3id, the BNC-version of AES3, is even simpler because you just need a BNC-to-RCA adapter. The impedance is perfactly matched and there is no grounding issue. The level is 6 dB higher than necessary which I once again would not change.
This paragraph is practically irrelevant if the DA2USB is only used with a newer operating system. The jumper AC then does not need to be plugged in, nor does the pin header J1 need to be fitted.
The DA2USB operates always with 24-bit resolution at sampling rates up to 96 kHz in USB Audio Class 1 mode, which is supported by all operating systems.With a jumper next to the USB port it can be set how the DA2USB shall connect to the PC at high sampling rates (128, 176.4 and 192 kHz):
| Conclusion: | Setting the jumper AC: | |||
|
Recommended
|
Disadvantage other than the recommended setting | |||
| All newer operating system: |
1/2*
|
Only 16 bits at high sampling rates | ||
| Older Windows and OS XS: |
1
|
Delayed connection at high sampling rates | ||
*: With fixed setting 1/2 the jumper AC can also be omitted and the pin header J1 does not need to be fitted.
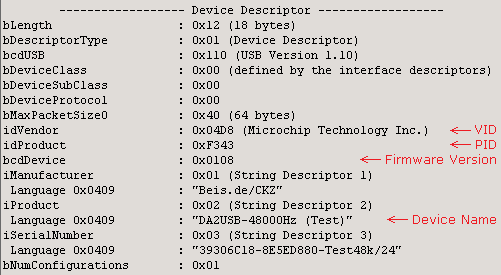
When connected to the USB host (e.g. PC or laptop) the DA2USB logs on as another audio device called DA2USB-xxxxxHz/24, where xxxxx indicates the sampling rate received by the digital interface. When this sampling rate changes, the DA2USB logs off and a few seconds later on again as a different audio device with the corresponding name resp. sampling rate.
In Windows prior to Windows 10, Vers.1709, DA2USB-xxxxxxHz/16 will be indicated at sampling rates greater than 96 kHz.
The input is automatically selected:
The green LED next to the USB connector on the rear signals by slow flashing that the DA2USB is ready for data transmission. It does not signal that the data transmission also works. It lights up constantly when the data transfer is taking place. It displays with dual flash that a connection with 128, 176.4 or 192 kHz was established to a Windows PC. It goes out briefly when the sampling rate of the audio signals is changed. The flashing stops entirely after 3 minutes without change of state in order not to disturb the user.
The DA2USB is intended for recording on the PC. Playback must take place via another PC-hosted audio device.
| Note: | This means that the signal from
DA2USB via USB is not directly audible on the PC under normal
circumstances, i.e., it is not available in the playback controls. The
signal can only be recorded and can only be heard during playback. This
is caused neither by the DA2USB nor by the operating system of the PC.
It is caused principally by the digital technology: Correct
reproduction of real time digital audio signals (e.g., signals from an
ADC, TV or CD player) is possible only when the clocks of the source
(ADC etc.) and the DAC run exactly synchronous. But the exact timing of
the source is lost when the signal passes through a PC.
If playback via another audio device (i.e., a DAC, which necessarily runs with another asynchronous clock) is possible at all, it is therefore possible only with compromises. For this reason buffers are usually introduced, which on the one hand cause a delay of the output signal and on the other hand over time they may overflow or underflow due to the asynchronous clocks. In these cases usually complete buffer contents are discarded in case of overflow or repeated at underflow, causing serious disturbances in the signal. Often such a signal path is therefore not even provided. Depending on the operating system and the application program, it may be possible to make the audio signal from DA2USB audible even though or to make it at least visible with a level meter. Audacity, which is mentioned below, cannot only display the audio level but offers moreover the possibility to make signals from DA2USB audible on other audio devices' outputs with the usual buffer delay and the possible overflow and underflow. |
If necessary, I recommend for recording, editing and playback of files the program Audacity (http://audacity.sourceforge.net/), which is free for Windows, Apple OS-X and Linux. This program offers much more than simply recording an audio signal.
Quite a while after I wrote this recommendation I experienced that on Windows Audacity has problems with 24 bit. I'd never expected that, but operating systems, applications and hardware are always good for big surprises. The reason is that the underlying MME API is able to work with 16 bit only. The most recent and 24 bit-capable API is WASAPI. With WASAPI I experienced that bit-precise 24 bit recordings are possible, but a) not with 88.2 and 96 kHz and b) with the most recent Audacity version 2.1.2 only. An "Error while opening sound device" appears. The Audacity developers are working on a full WASAPI support. It seems to be quite a challenge.
Update(s):
The current state is that one week after I discovered the 96/24 bit issue with Audacity on Windows, Carsten (mentioned above) cared for Audacity's source code which is currently under development (2.1.3), found out, why it doesn't work at 96/24 and modified it. For him, this was no big challenge. His Audacity version is able to record up to 96/24, (currently with DirectSound only but not with WASAPI). The one and only setting that his modification affects is Edit ➝ Preferences ➝ Quality ➝ Default Sample Rates: 24-bit when DirectSound is selected (which is currently simply ignored and reset to 16 bit). It should be no problem for the Audacity to approve and to adopt it.
Addendum to the update: Later it turned out that this "Error while opening sound device" appears only when a) Software Playthrough or Overdub is enabled and b) there is no output device with 96 kHz capability available. Originally I recommend Goldwave as an alternative here, but because Goldwave doesn't have the Software Playthrough or Overdub capability at all, there is actually no benefit of it. However, I didn't remove the very brief introduction to Goldwave at the end of this article anyway.
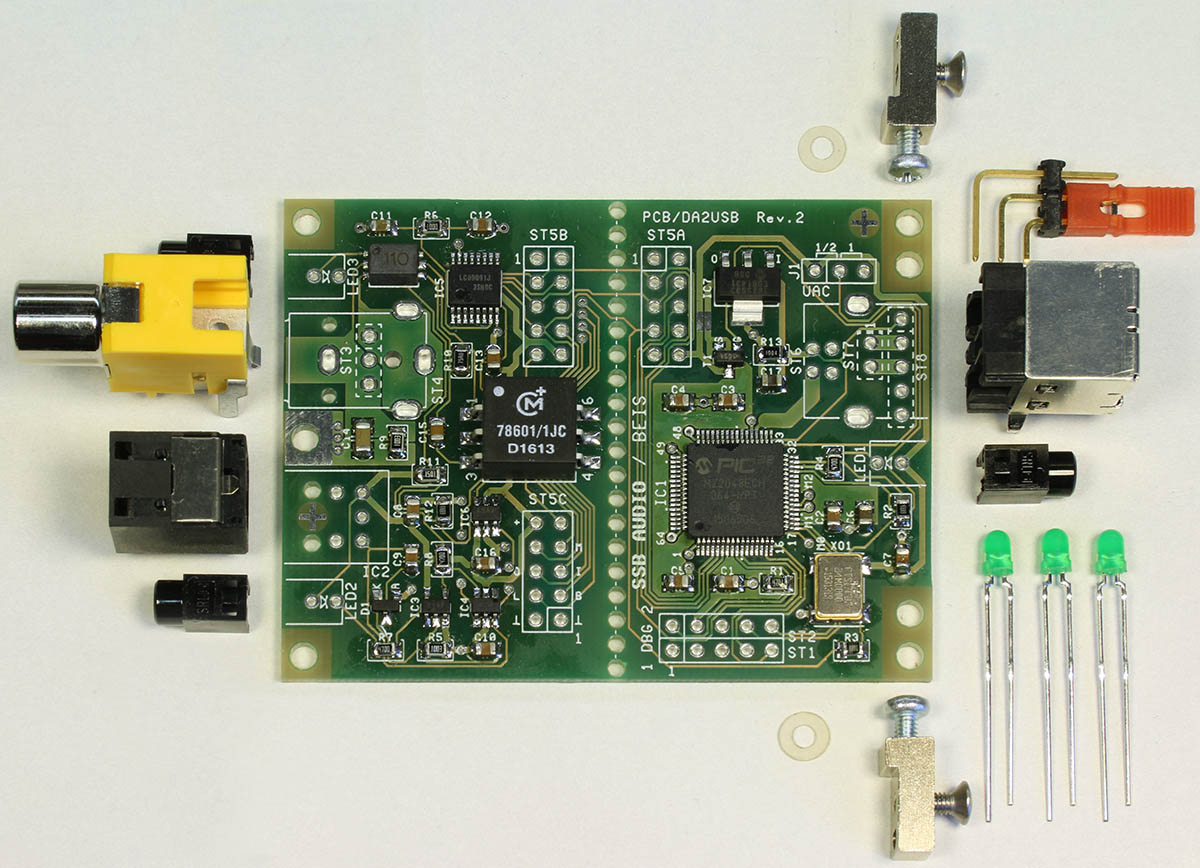 The
DA2USB comes as a kit with all
SMDs soldered, the processor programmed and the board tested. The THT
devices (up to just 7, depending on the final application) must be
populated by the user. This is the contents of the basic kit:
The
DA2USB comes as a kit with all
SMDs soldered, the processor programmed and the board tested. The THT
devices (up to just 7, depending on the final application) must be
populated by the user. This is the contents of the basic kit:
*: With modern operating systems this pin header and the corresponding jumper is no longer required, see USB Audio
Classes.
**: For the GB 46 enclosure only one screw each, one
mounting element and no washers are necessary.
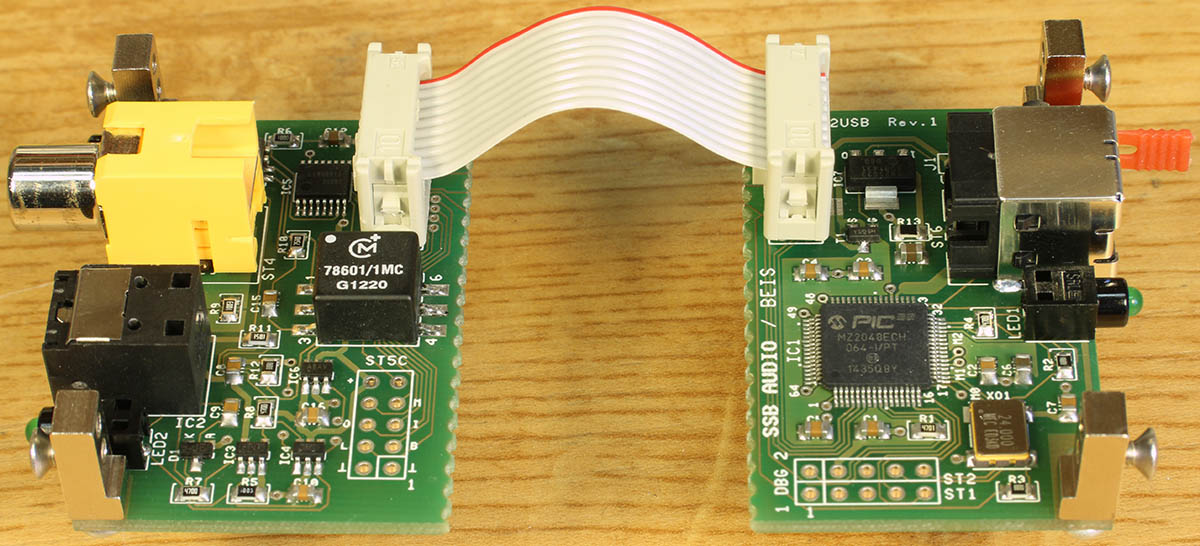
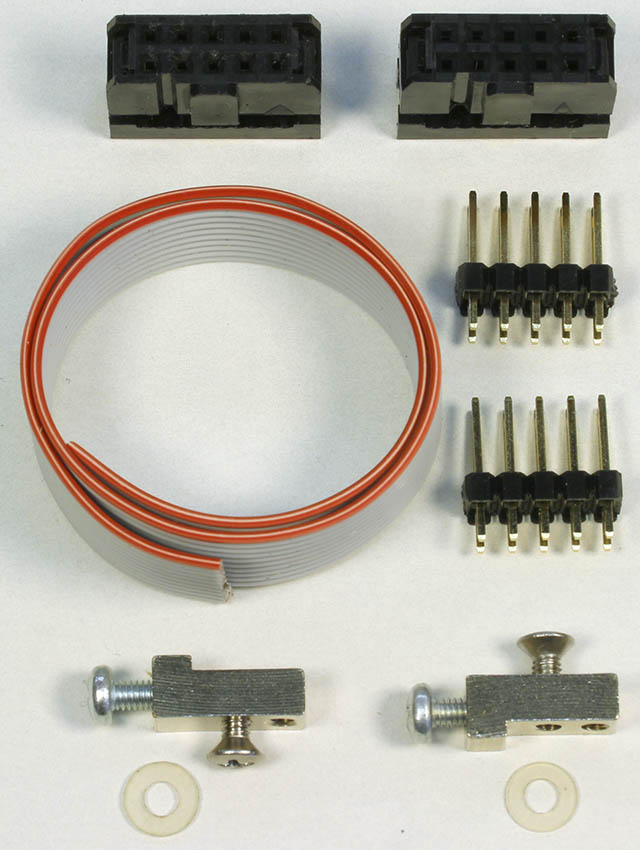 When
the PCB is split, both parts are connected with each other by a 2x5 pin
ribbon cable. Also for both boards more mounting components are
necessary. This is the contents of the PCB split kit:
When
the PCB is split, both parts are connected with each other by a 2x5 pin
ribbon cable. Also for both boards more mounting components are
necessary. This is the contents of the PCB split kit:
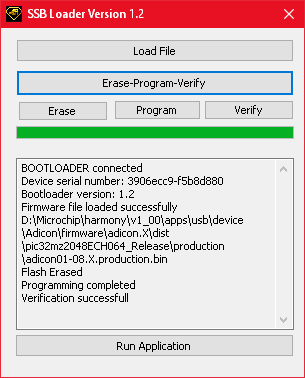
Firmware Update: The DA2USB is equipped with a bootloader. Thus new firmware can be loaded via the USB in case of an update. Only our loader program (the SSBLoader) and a Windows PC is necessary for that. A special programming hardware is not required.
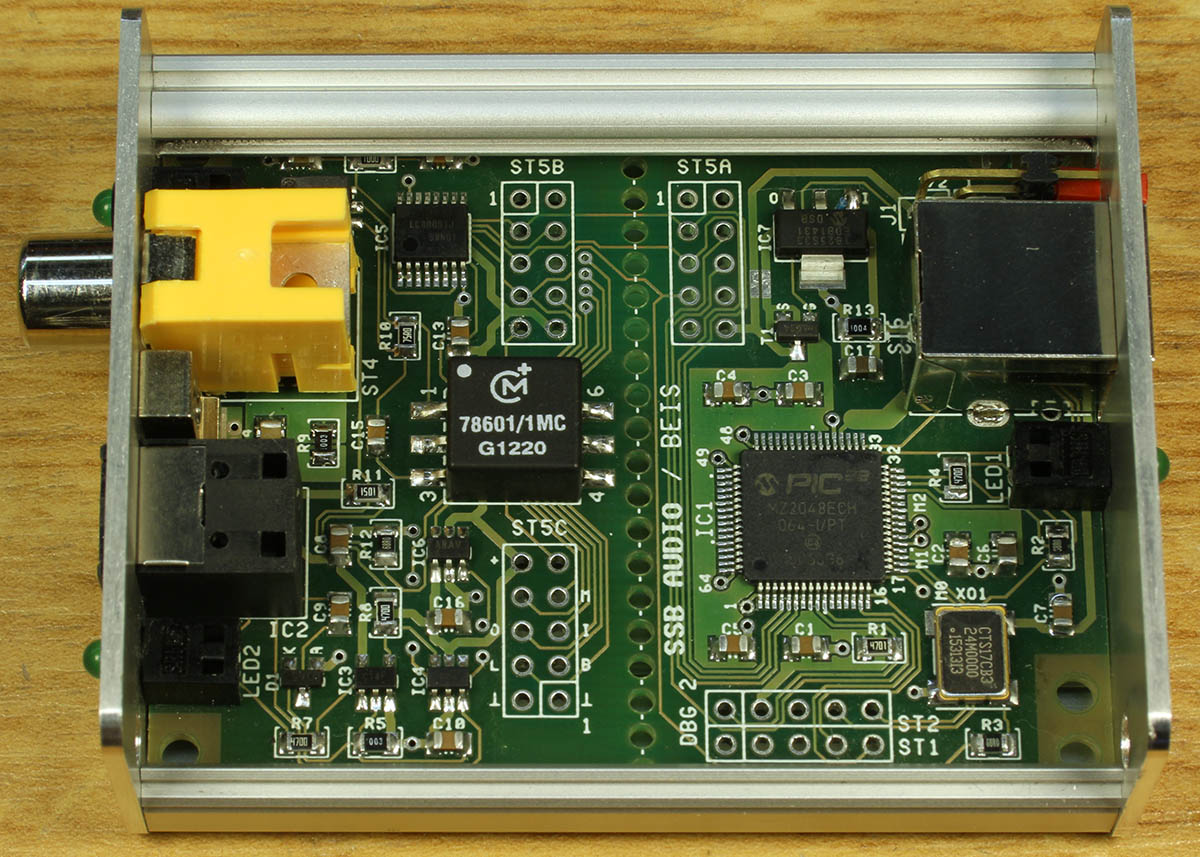
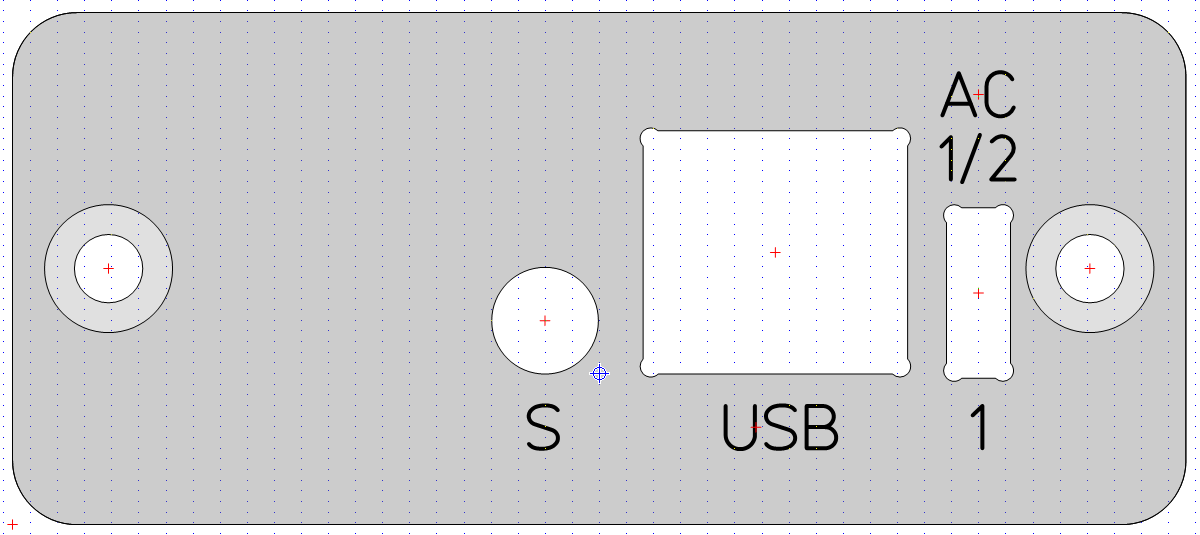
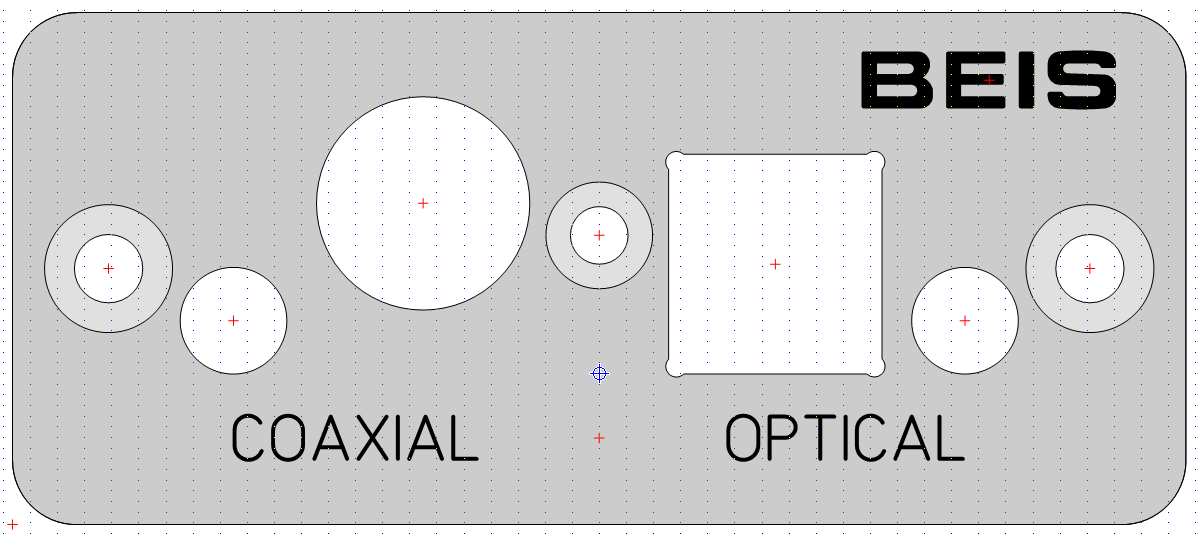
There is no enclosure supplied with the kit. However, I do offer a matching case and front and rear panels for the kit. Refer to AD/DA24QS_Order for availability. There are also a couple of different options how you can build it into your own enclosure. Depending on the final application it can be built:
| a.) Standard: Stand-alone enclosure with 67 mm distance between between a front and a rear panel | |||||||||||
 Enclosure: The example
shows the enclosure offered by me from two aluminum profiles GB 46 ME from the (German) company Fischer Elektronik. They are sawed to 67 mm length. Because it has rails for the PCB only one mounting element is necessary. For details and drawings look at the miniature aluminium case AKG 55/24 where the same profile is used. Enclosure: The example
shows the enclosure offered by me from two aluminum profiles GB 46 ME from the (German) company Fischer Elektronik. They are sawed to 67 mm length. Because it has rails for the PCB only one mounting element is necessary. For details and drawings look at the miniature aluminium case AKG 55/24 where the same profile is used.
No insulating washer, as described below, is required in this enclosure. |
| ||||||||||
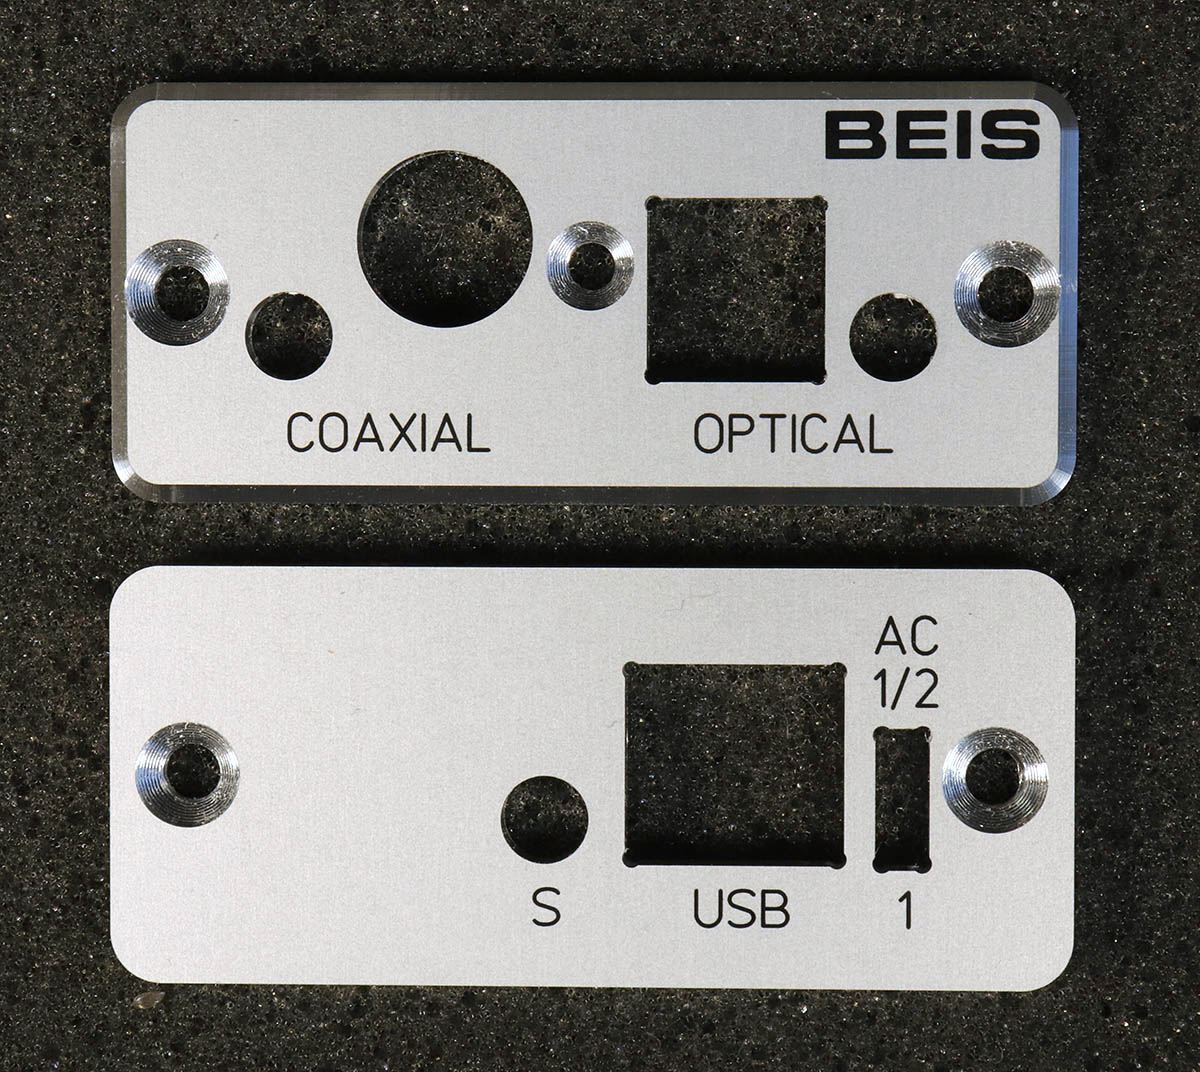 Finished front and rear panels: I also offer finished front and rear panels to match the GB 46 case. They are 2.5 mm thick, lettered in sub-anodized print, milled, have blank outer edges and the front panel has a bevel all around. Finished front and rear panels: I also offer finished front and rear panels to match the GB 46 case. They are 2.5 mm thick, lettered in sub-anodized print, milled, have blank outer edges and the front panel has a bevel all around.
|
 |
||||||||||
|
Individual front and rear panels: In case individual front and rear panels are desired, I recommend what I did on the prototype: There I used milled and engraved front and rear panels manufactured by Schaeffer AG (in Europe), also available in the US from Front Panel Express, LLC, too. I provide the design files for this here. You may also modify the design files with the front panel design software "Front Panel Designer" German, English or French (it's free and very convenient) so that it fits to other enclosures of your choice. These are the design files I prepared:
  Just send these files or modified versions to the manufacturer and then you get perfectly milled and engraved front and rear panels. However, they are not quite cheap, but that can not be avoided with individual, professionally made enclosures. |
|
||||||||||
| b.) Installed in "foreign" devices. External connectors are needed on one side only, either input or output. | |||||||||||
|
PC mounted: It should be possible to mount the DA2USB behind a PC slot bracket so that it becomes a kind of an internal sound card. But this is not easy: The RCA jack is too high to fit into the 12.7 mm opening in the PC's rear panel. If at all, the RCA jack must be placed directly on the PCB by opening the 3 holes underneath the jack to 2.0 and 2.2 mm so that it settles 1.9 mm lower directly onto the PCB's surface. The PCB must be fixed behind the bracket so that the top side (component side) of the PCB is 6.35 mm away from the center of the bracket. Then you have a chance that neither the RCA jack itself nor the plug in it contacts the PC's case. When it touches the PC's case the S/PDIF connector is no longer insulated and ground loops may occur. The USB jack (ST6) can be replaced by a 4 or 5 pin header (ST8) and two short jumpers (ST6 ➝ ST7) so that the internal USB cable is pluggable or the cable can alternatively be directly soldered into the USB jack's pads. You must obey the correct USB wire colors as shown on the photo. |
 |
||||||||||
|
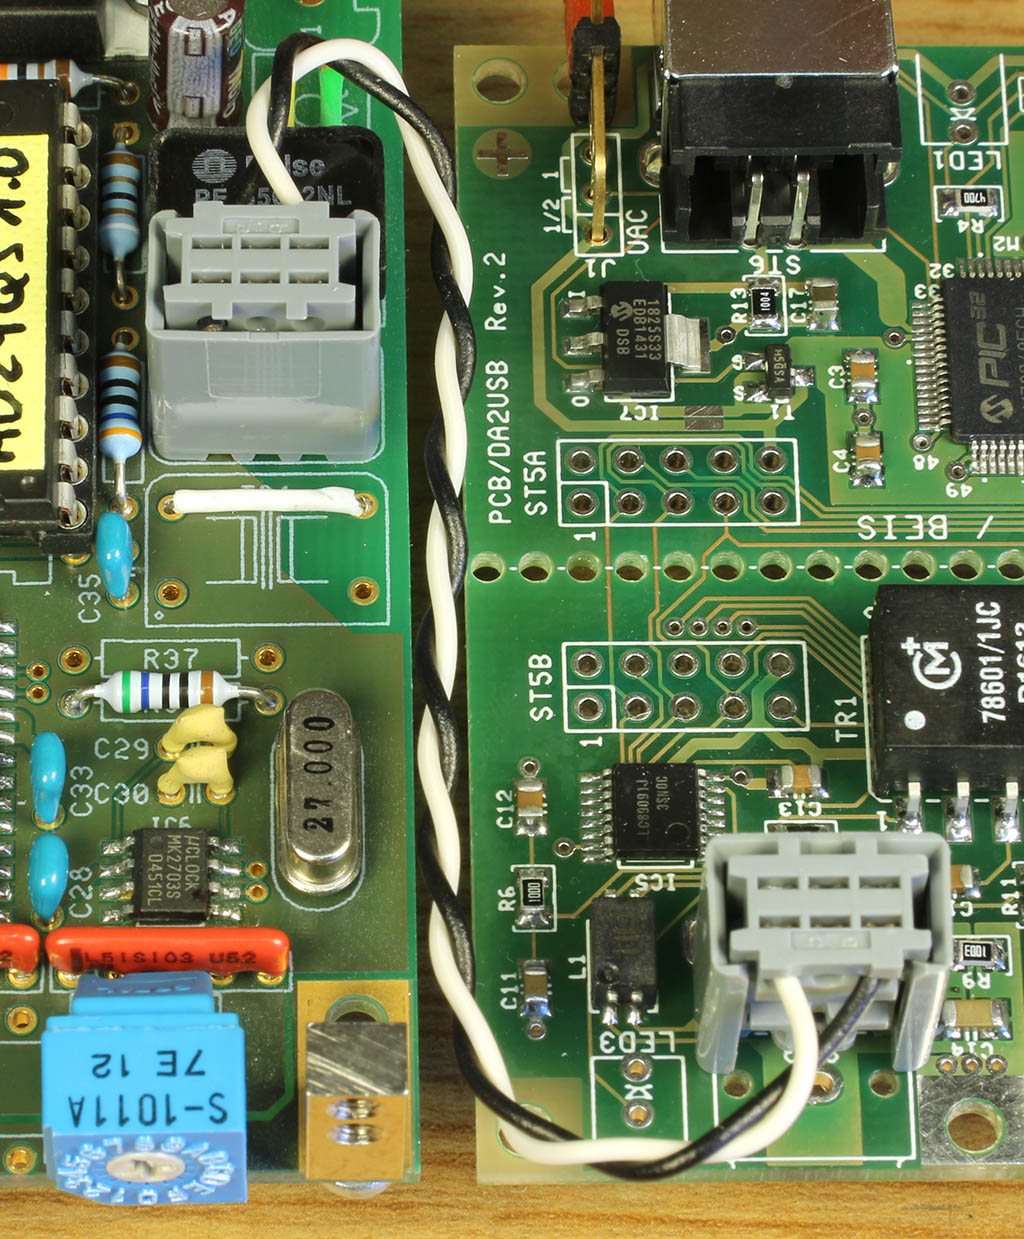
Device mounted: When the DA2USB shall be installed into a device's enclosure, e.g., an ADC, CD player or so, other items must be observed:
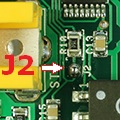
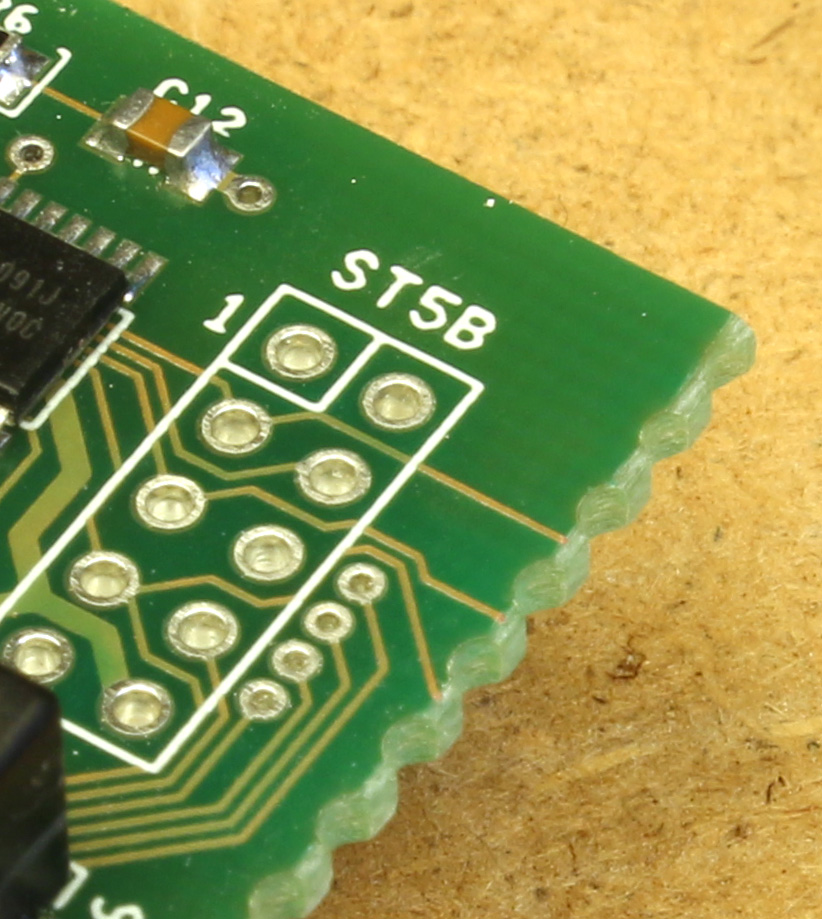
The second item is electrical: Should you happen to have an extra S/PDIF output within the device (like on the AD24QS), you can connect it directly with a coaxial cable to the DA2USB's S/PDIF input, as shown on the photo. If not, you can connect this coaxial cable in parallel to the device's S/PDIF output. In order to avoid that the S/PDIF output gets terminated twice when it is connected externally, too, the 75 Ω input resistor (R10) should be disabled by removing the solder joint called J2 (available from PCB Rev. 3 on, located just behind the RCA input jack).
|
 |
||||||||||
|
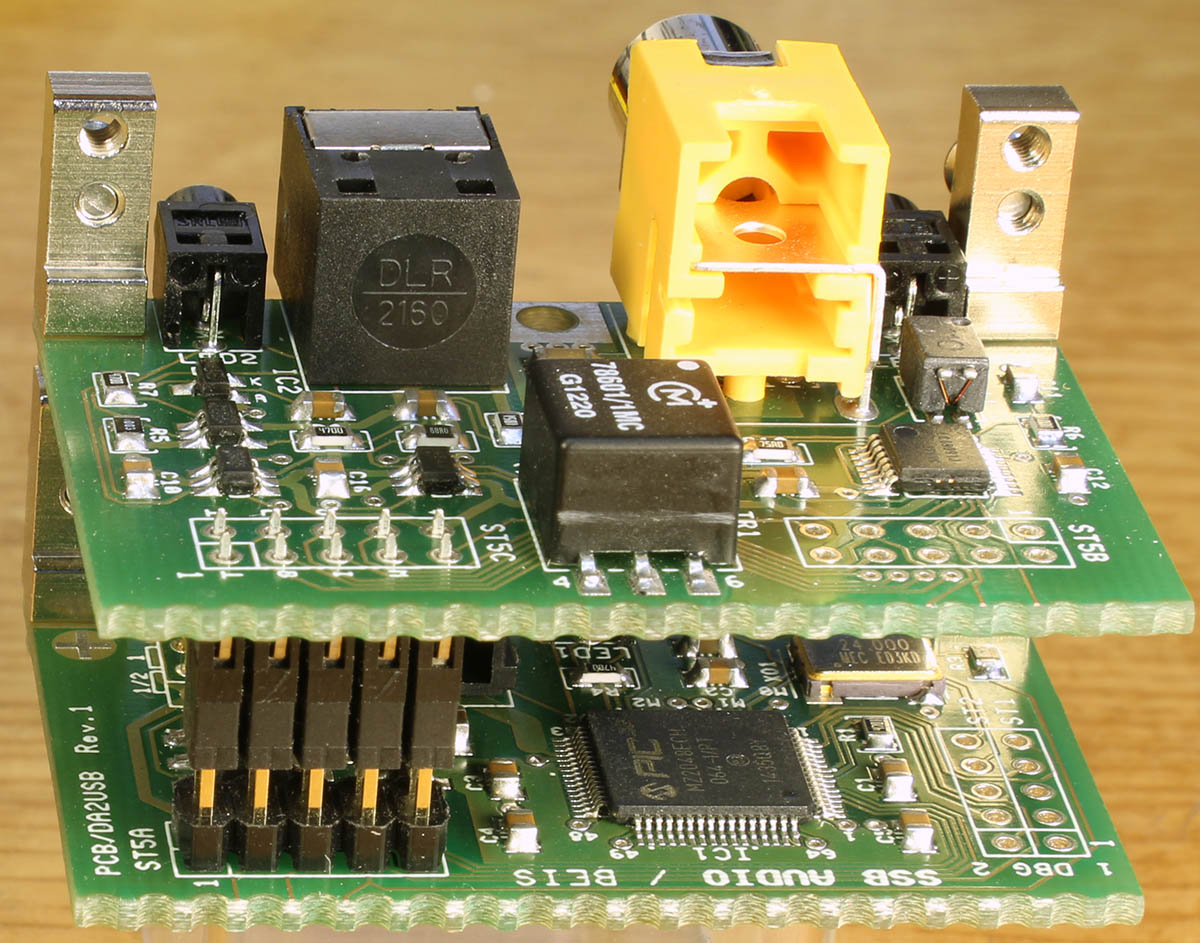
c.) Installed in individual enclosures. The PCB is split which offers different mounting options. Individual mounting requires the option "DA2USB Split Kit" which contains cable, connectors, additional screws, washers and mounting elements. |
|||||||||||
|
Extended: Any space between front and rear panel. ST5A and ST5B are used and connected with a suitable ribbon cable. |
 |
||||||||||
| Side-by-side: Completely mounted behind one panel only. ST5A and ST5B are used and connected with a short ribbon cable. | 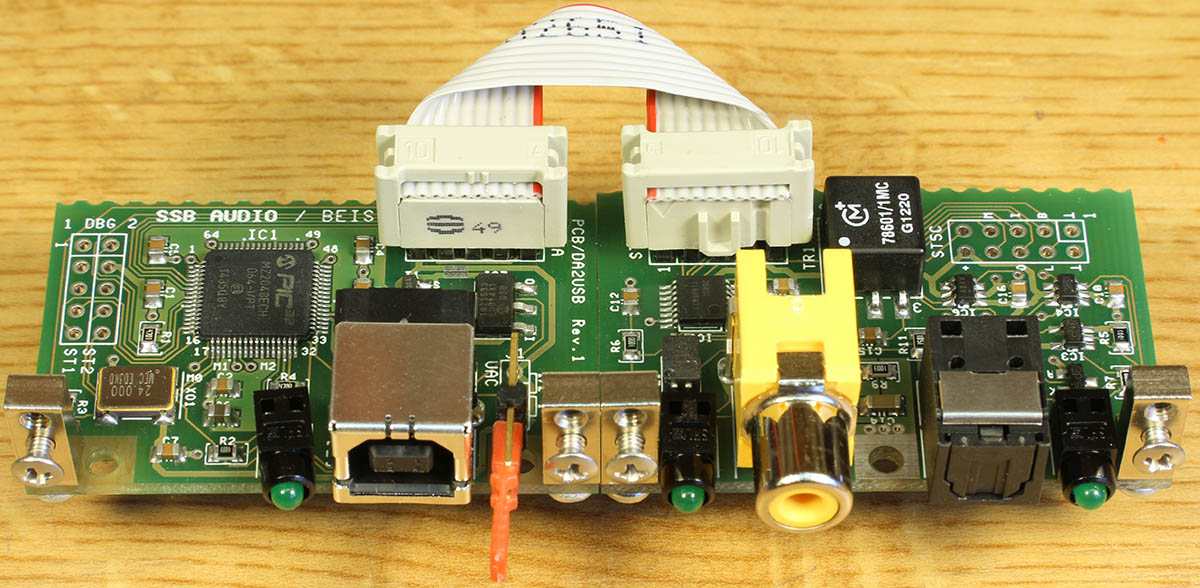 |
||||||||||
|
 |
||||||||||
| Sandwich: Like stacked, just one of the boards is mounted head-over. ST5A and ST5B are used and connected with a short ribbon cable. | 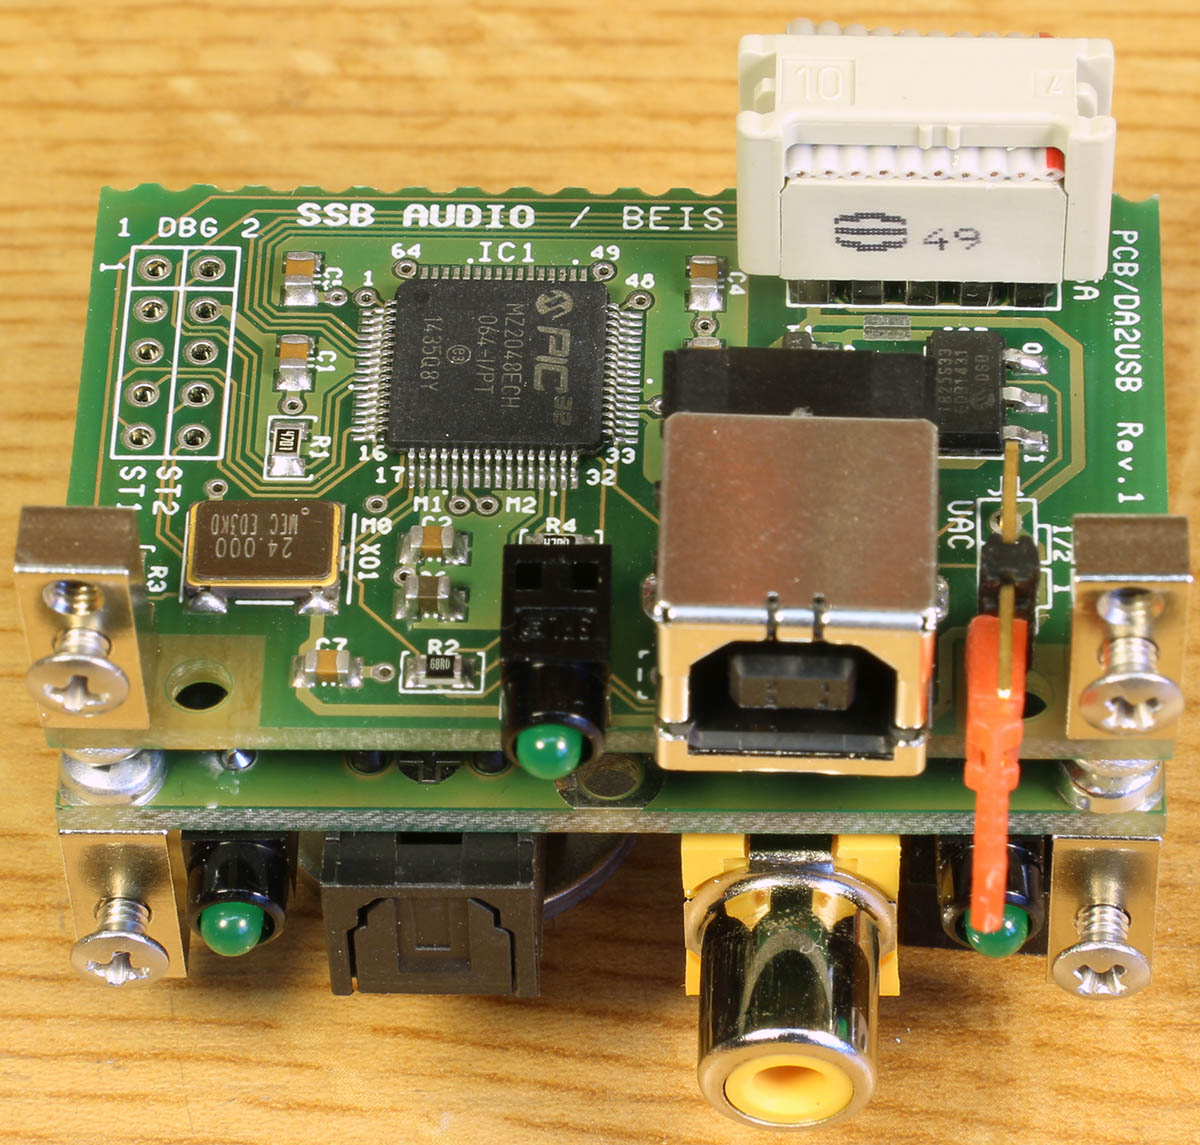 |
||||||||||
If you are experienced there is not much that I can tell. But if not: Beware, it is not as simple as it seems. And you have one attempt only.
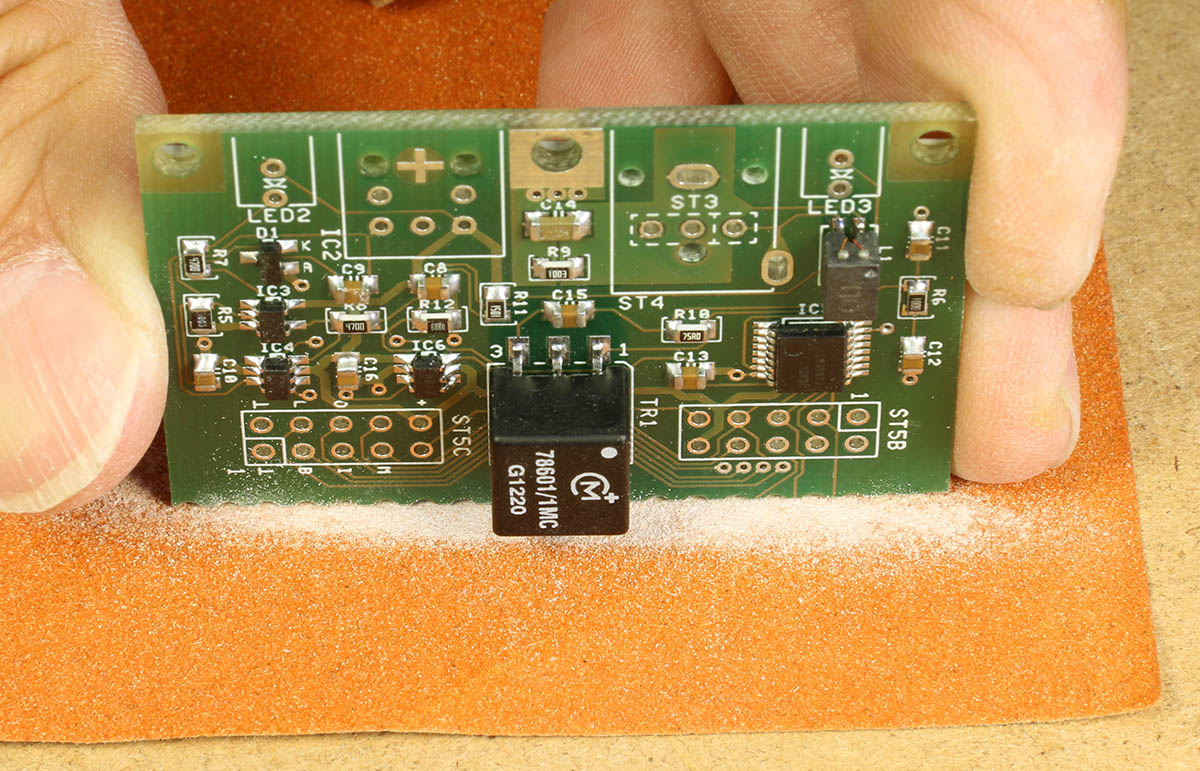
The PCB is perforated where it is intended to be split. But do not just break it there! I recommend two methods: Either to saw it or to cut it with a knife before breaking it.
| When you cut it, use e.g. a cutter as shown in the picture. Be careful when you cut: The cutter does not inevitably follow the row of holes. It tends to take its own way when you don't guide it correctly along the holes. Don't use too much power for the first cut. Increase it with the next cuts. Repeat it for the opposite side. You won't be able to cut through the whole PCB. The right hand picture shows how it looks like when it is cut 5 times each side. This is enough so that the PCB can safely and easily be broken. |  |
 |
When you saw the PCB do not forget to protect the bottom (solder) side of the PCB so that it is not scratched when it it is pressed on the support.
Whether I cut and break or saw the PCBs: Afterwards I sand or file the edges in order to make them look neater. You can call me fussy.
|
|
|
|
 Preparing the LEDs
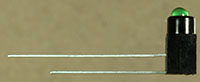
The photo on the right shows how the LEDs must be built into the LED holders, their polarities (the long leads are anode) and how the leads must be bent.
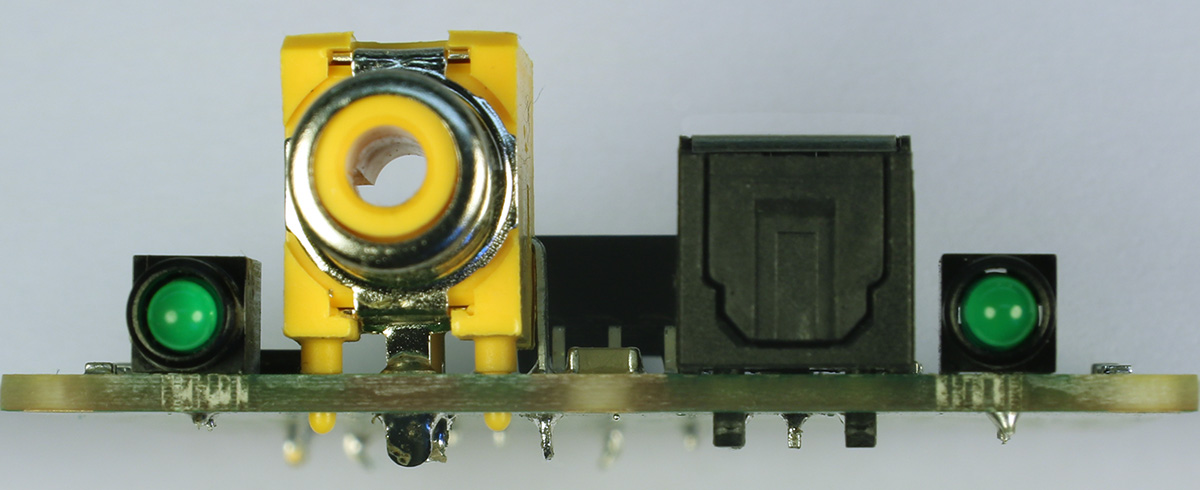 Press the RCA jack with sufficient power into the PCB so that
the thin section of all 3 plastic stands are fully in the PCB's quite
narrow holes, as shown on the photo. Also have an eye on the correct instertion of the optical connector.
Press the RCA jack with sufficient power into the PCB so that
the thin section of all 3 plastic stands are fully in the PCB's quite
narrow holes, as shown on the photo. Also have an eye on the correct instertion of the optical connector.
Actually you should have some practice, but if not: Well, you have a good chance when you take care.
 When
the DA2USB is installed in the same enclosure as the AD24QS what is
written under Device mounted, particularly the
insulation must be regarded, of course. Because the AD24QS has a 3rd
digital output which is actually provided for an AES3 output, these
resources can be "misused" for a fairly elegant internal link to the
DA2USB.
When
the DA2USB is installed in the same enclosure as the AD24QS what is
written under Device mounted, particularly the
insulation must be regarded, of course. Because the AD24QS has a 3rd
digital output which is actually provided for an AES3 output, these
resources can be "misused" for a fairly elegant internal link to the
DA2USB.
The AD24QS/DA2USB link set provides all necessary components.
On the AD24QS you need to:
On the DA2USB you need to:
Both boards are connected with each other by a 2-wire cable as shown on the photo. Of course you can also directly solder wires into the corresponding PCB pads, but I prefer to make things pluggable.
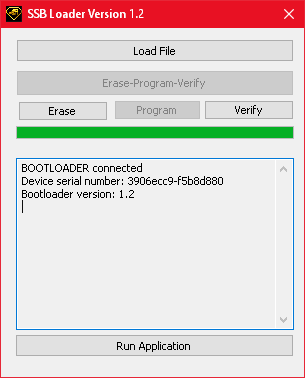
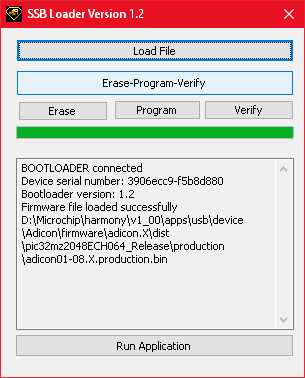
It is possible to update the DA2USB's firmware via USB from a Windows PC.
Recommendation: Do not update the firmware if the latest version is already installed. How to find out which version is installed can be found below. The latest version is always installed on delivery.
The procedure in short:
Detailed explanation and additional information:
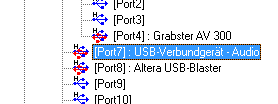
Recommendation: In order to view and check which USB devices are connected to the PC and examine their properties, I recommend to download from Uwe Sieber's Homepage the USB Device Tree Viewer: http://www.uwe-sieber.de/english.html. It is available for Windows only. And appreciate that Uwe Sieber makes this helpful utility available.
For the DA2USB update you need to follow this process:
![]() Audacity
is a free open source software for professional recording, editing and
playback of audio signals and provides much more
functions than within the scope of the usual use of the DA2USB is
required. The huge number of functions is not only advantageous, it may
also cause confusion for a beginner so that a start becomes more
difficult than necessary.
Audacity
is a free open source software for professional recording, editing and
playback of audio signals and provides much more
functions than within the scope of the usual use of the DA2USB is
required. The huge number of functions is not only advantageous, it may
also cause confusion for a beginner so that a start becomes more
difficult than necessary.
Other recording software is generally not free but offers in return a wider range of functions. As far as my experience goes, for this but also for other reasons it is sometimes significantly more difficult to learn to know these programs.
This is why I recommend and present a short introduction to Audacity and its most important functions here.
| Note: |
Computers are highly complex systems. Their behavior is not always explainable and not always reproducible. Particularly in the case of cooperation with external hardware applications work in some cases only after extensive tests and possibly further measures. The number of possible obstacles is enormous, sometimes insurmountable obstacles also arise. The application software is complex, too, and if important settings are incorrect or operating procedures are unclear in the software, another source of alleged malfunctions arises. Quite a long time after I wrote this text I made such an unpleasant and sad experience: The completely unexpected issue with Audacity and 24 bit recording. Therefore, the responsibility for the correct operation of the entire system is with the user. I cannot take over this responsibility. The DA2USB has been successfully tested with several computers, operating systems and recording programs. |
Audacity is available for Windows, OS X (from 10.6, Snow Leopard on) and Linux.
When it is installed on OS X 10.9.5 and higher it may happen that the start of the installation will be blocked because the identity of the developer cannot be verified. In case that the program has been downloaded from a trustworthy source the installation process can be resumed without fearing negative consequences. In this case you need to:
After the installation of Audacity all except a few settings are so that you can directly work with it.
For some reason which I never really understood, a default sample format must be selected. Internally, Audacity records everything in 32 bit float format anyhow. Anyway, goto Edit ➝ Preferences ➝ Quality ➝ Default Sample Rate and set it to 24-bit.
In Windows you also must select the Audio Host: As written above, on Windows Audacity has problems with 24 bit. 24 bit are possible from the most recent Audacity version 2.1.2 on only and under the following circumstances:
- With WASAPI as audio host only, either in the drop down box
(left of the recording device selection) or in Edit ➝ Preferences ➝ Devices ➝ Interface ➝ Host ➝ Windows WASAPI, and additionally:
- Normally up to 48 kHz only or
- when neither Software Playthrough nor Overdub is activated or
- when another audio device with 96 kHz output capability is available on your PC.
Otherwise at sample rates > 48 kHz "Error while opening sound device." messages will appear.
In our modified Audacity Version 2.1.3_CKZ 24 bit works with DirectSound as audio host up to 96 kHz perfectly, so you should select
as audio host there. But don't forget to set the Default Sample Rate to 24-bit, too. I very much hope that in future in the final Audacity Version 2.1.3 this will be the same.
 When
the DA2USB is connected through its USB interface before
Audacity has been started it can resp. must be selected as a
recording device in the drop down box beside the microphone symbol.
When
the DA2USB is connected through its USB interface before
Audacity has been started it can resp. must be selected as a
recording device in the drop down box beside the microphone symbol.
When the DA2USB is connected through its USB interface after Audacity has been started it must first be introduced to Audacity before it can (and must) be selected as a recording device: Transport ➝ Rescan Audio Devices.
The same applies when the sampling rate at the DA2USB is changed. In this case the DA2USB logs off from the operating system and logs on again after a couple of seconds with a new name. Only then the “new“ DA2USB is available as recording device in the drop down box beside the microphone symbol and can (and must) be selected again.
At sampling rates greater than 96 kHz please also regard chapter USB Audio Class 1 and USB Audio Class 2.
![]() The
project rate (project’s sampling rate) should match the sampling rate
of the DA2USB, otherwise a sampling rate conversion during recording
will take place. The project rate that Audacity adopts after start-up
can be set in Edit
➝ Preferences ➝ Quality ➝ Default Sample Rate.
The
project rate (project’s sampling rate) should match the sampling rate
of the DA2USB, otherwise a sampling rate conversion during recording
will take place. The project rate that Audacity adopts after start-up
can be set in Edit
➝ Preferences ➝ Quality ➝ Default Sample Rate.
![]() When
monitoring is enabled with Transport ➝ Software Playthrough,
the DA2USB’s signal can be listened to with a click on the recording
level meter.
When
monitoring is enabled with Transport ➝ Software Playthrough,
the DA2USB’s signal can be listened to with a click on the recording
level meter.
Not very surprising, recording is started with the record
button ![]() (or
key R), paused with the pause button
(or
key R), paused with the pause button ![]() (or key P)
or terminated with the stop button
(or key P)
or terminated with the stop button ![]() (or key space).
(or key space).
With each new start a new audio track is instantiated. Needless audio
tracks can be removed with the X in ![]() .
.
As already described in chapter Recording Only, listening to the DA2USB's signal through the PC during recording is possible but with a certain delay and a high probability that after more or less time faults in the heard (but not in the recorded) audio signal will appear. Monitoring is enabled with Transport ➝ Software Playthrough. (Note: In Audacity version 2.1.2 monitoring will normally impede operation at sample rates > 48 kHz.)
When an audio track has already been recorded and a new audio track is instantiated with a new recording, the previous audio track will simultaneously be played back. This is important for musicians but bothering when e.g. records shall be digitized. This option is called ”overdubbing” and can be disabled with Transport ➝ Overdub. (Note: In Audacity version 2.1.2 this will normally impede operation at sample rates > 48 kHz.)
Also not very surprising, playback is started and stopped with
the playback button ![]() (or
key space) and can be paused with the pause button
(or
key space) and can be paused with the pause button ![]() (or key P).
(or key P).
During playback individual audio tracks can be muted or
selected to be solo, i.e., to be the only audible track with ![]() .
.
Using the selection tool ![]() a time marker can be
set or a time period can be selected. Afterwards this marker or
selection may be modified with this tool.
a time marker can be
set or a time period can be selected. Afterwards this marker or
selection may be modified with this tool.
Using the functions ![]() (zoom in and out),
(zoom in and out), ![]() (zoom a time period)
(zoom a time period)
![]() (display the whole
recording) and
(display the whole
recording) and ![]() (zoom
the selected time period) parts of the recording can be displayed in
detail, e.g., in order to examine specific events like the beginning or
the ending of a part or a disturbance within a recording and to modify
it.
(zoom
the selected time period) parts of the recording can be displayed in
detail, e.g., in order to examine specific events like the beginning or
the ending of a part or a disturbance within a recording and to modify
it.
A selected time period will be removed with the scissors
symbol ![]() and
everything subsequent will be moved left.
and
everything subsequent will be moved left.
Single samples can be modified, e.g., in order to remove
clicks. For this purpose, first the corresponding time period must be
zoomed so far that the individual samples become visible as dots. With
the draw tool ![]() these
samples can be modified or even a whole freehand line can be drawn.
these
samples can be modified or even a whole freehand line can be drawn.
This function will be useful when e.g. an LP record was
recorded in one piece and shall be separated into individual tracks.
This is possible automatically or manually.
For manual separations the corresponding beginnings and ends of the
individual parts must be located. It is advisable to:
 In
order to locate exactly the gaps between the tracks expand the display
vertically by clicking with the cursor, which turns into a vertical
zoom tool, repeatedly on the 0.0 left of the audio track.
In
order to locate exactly the gaps between the tracks expand the display
vertically by clicking with the cursor, which turns into a vertical
zoom tool, repeatedly on the 0.0 left of the audio track.
If required the selected time period can be copied now into a new audio track:
The selected time period or part as well as the audio track that was copied from it may be exported as a file. Refer to chapter Save an Audio Track or a Part of an Audio Track to File.
Simple fade in and out may be performed by selecting the
desired time period to be faded and then by applying Effect ➝ Fade In resp.
Effect ➝ Fade Out.
More options are available with the envelope tool ![]() .
.
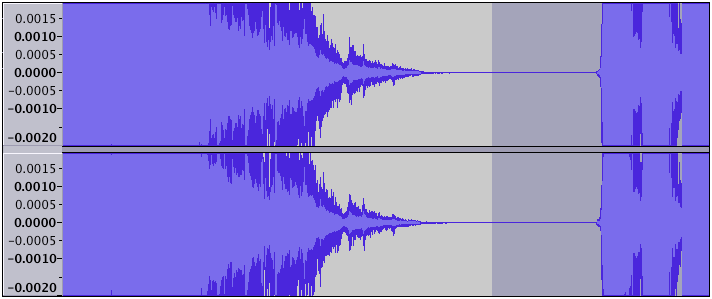
When a digital recording is made, considerable headroom should be reserved in order to avoid overdriving in case of unforeseeable loudness peaks. Only when the recording is finished it is apparent how much of this headroom was actually used and only then it is possible to subsequently adjust the recording level so far that the loudest location of the recording reaches exactly 100% or, as usual, a slightly lower level. This is commonly the case at commercial records like CDs. Due to the DA2USB’s extreme resolution of 24 bits losses in signal quality need not to be feared. Such losses can only appear at resolutions of 16 bit or less in a very small amount.
Audacity is able to perform this process automatically. First the whole audio track is selected, e.g., by clicking into the control section left of the audio track or by selecting all audio tracks by key ctrl-A. Then normalizing is initiated with Effect ➝ Normalize....
| Note: |
At recordings from vinyls clicks or cracks caused by scratches on the surface or particles in the groove may cause significantly higher signal amplitudes than normal. Even in this case normalizing would refer to the loudest click or crack but not to the loudest audio signal. Such clicks, cracks or crackle may possibly be reduced or removed by changing single samples (refer to above) or by a click filter, an effect for the advanced users: Effect ➝ Click-Removal. |
Complete audio tracks may be saved by File ➝ Export Audio... to a file. Selected time periods may be saved by File ➝ Export Selected Audio... to a file.
Different compressed and uncompressed audio formats are available. Particularly popular are e.g. WAV and MP3. Uncompressed 24 bit-audio, the native format of the DA2USB, will be saved when in File ➝ Export Audio... ➝ Save as type ➝ Other uncompressed files ➝ Options... ➝ Header: WAV (Microsoft) / Encoding: Signed 24 bit PCM is chosen. Afterwards a variety of Meta data may be added if required.
Due to reasons of patent law the free MP3 encoder Lame needs to be installed subsequently in order to generate MP3 files. When it is not installed and an MP3 file is to be encoded the process of installing this encoder is explained.
As already written Audacity offers much more features than mentioned here. Click through the menus and submenus and look at the functions. Many of them are self-explaining.
Also have a look at the various settings in Edit ➝ Preferences. You will understand many of them immediately.
For everything else we would like to point to the help function in Audacity as well as to the descriptions and videos about Audacity in the Internet to learn to know it.
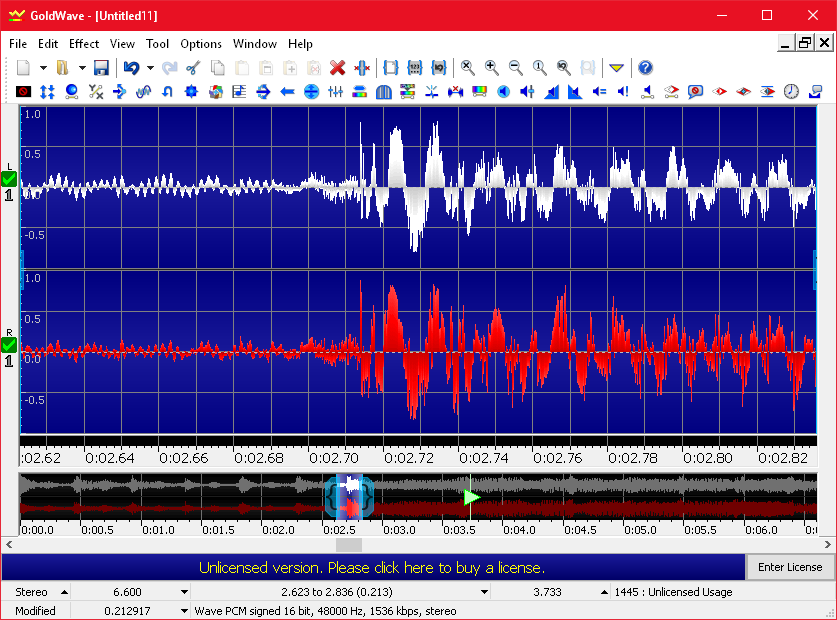
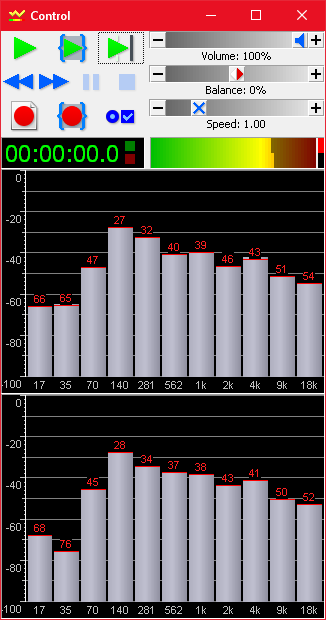
This is a very short introduction to GoldWave, not more than just necessary to make a first record.
After installation you can work with an unlicensed GoldWave version for 200 commands, than you can still save your results and restart the program.
Select the DA2USB with either F11 or Options ➝ Control Properties ➝ Device ➝ Record ➝ DA2USBxxxx and ➝ Quality ➝ PCM 24 bit. When the input signal is changed, e.g. by changing the sampling rate at the DA2USB, the new device must be selected again. The signal is always recorded with the incoming sampling rate.
Start recording with the recording button. Confirm when you are asked for a "Recording duration" - GoldWave's recording durations are always limited to a maximal length, which is by default 1 hour.
Unfortunately, this function, which is in Audacity also called "Software Playthrough" is not directly available in Goldwave. The GoldWave manual describes a workaround using the operating system. This is a) a bit complex because it takes a side trip through the operating system and b) not very useful because it is only possible while Goldwave does not use (i.e., record or display) the input signal. I regard this missing feature as the worst and a huge drawback of GoldWave. Anyway, this is how it is carried out: F11 or Options ➝ Control Properties ➝ System ➝ Configure... Now you are in the Windows sound control so that you can check or uncheck Recording ➝ DA2USBxxxx ➝ Properties ➝ Listen to this device ➝ 24 bit.
Parts of single audio tracks, complete audio tracks and all recorded tracks together can be saved. Details about what is to be saved can be chosen with File ➝ Save As... or File ➝ Save Selection As.... With Attributes you can now choose the format (e.g. WAV), number of bits (e.g. 24), the number of channels (e.g. stereo) and the sampling rate.
... is explained on page AD/DA24QS_Order.
| Last update: July 14th, 2023 | Questions? Suggestions? Mail Me! | Uwe Beis |

 The RCA jack, optical receiver and 2 LEDs can be omitted.
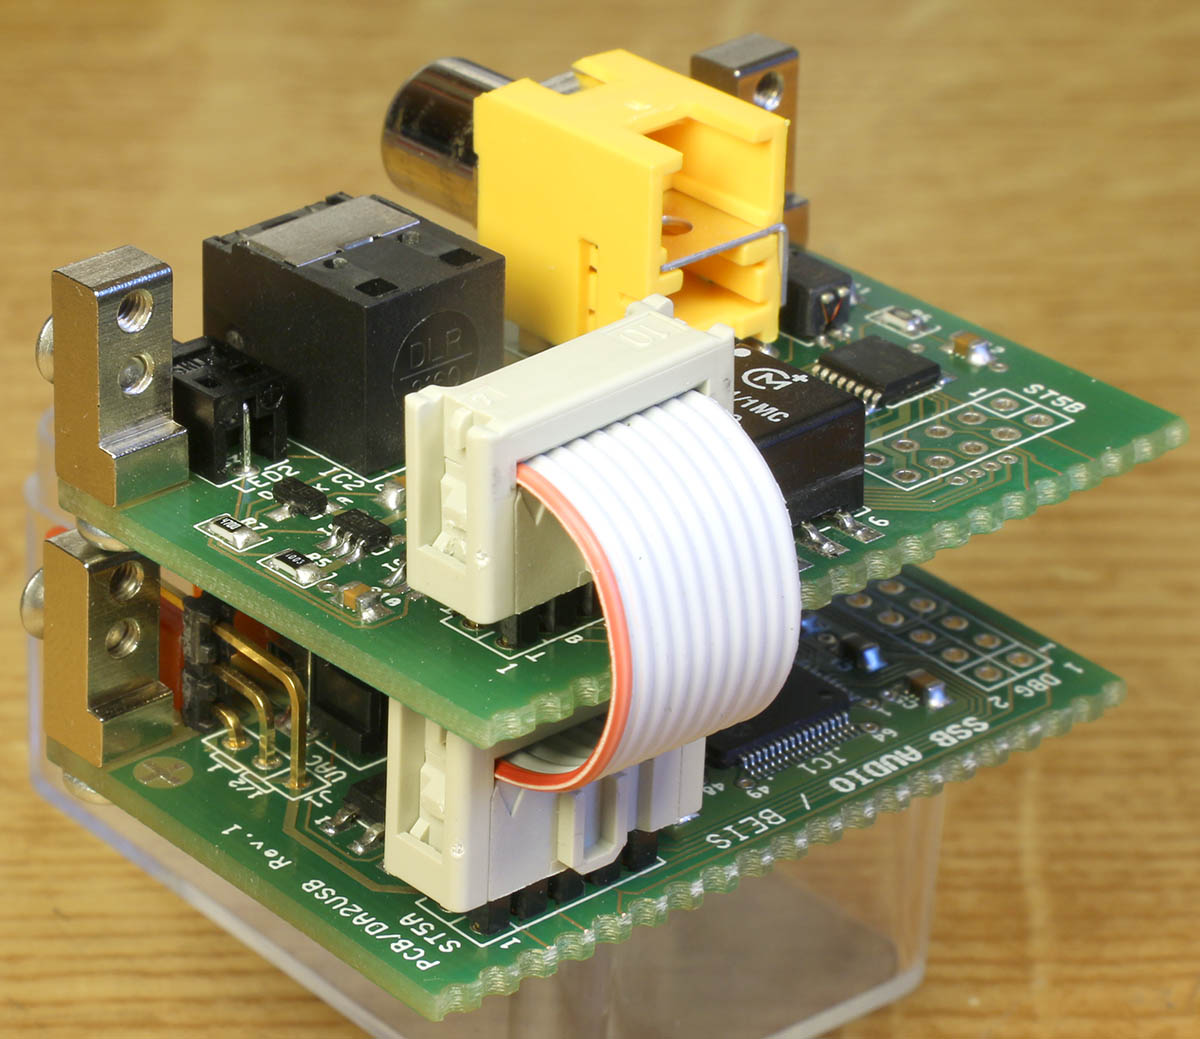
